


kate
-
Posts
3,272 -
Joined
-
Days Won
196
Content Type
Profiles
Forums
Downloads
Gallery
Events
Posts posted by kate
-
-
Enemy Territory provides a small graph with some network information which can be enabled by setting cg_lagometer to 1. Although this is not a feature specific to ET Pro, it has never been well-documented.
The lagometer consists of two graphs--the upper is the frame graph, and the lower is the snapshot graph. New data is added to the frame graph every time the client renders a frame (so this graph will move faster at higher framerates), and new data is added to the snapshot graph every time a snapshot packet is received from the server.
Contents
Snapshot Graph
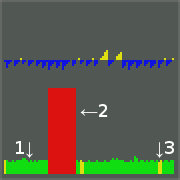
The snapshot graph is the easiest to understand--it is essentially a graph of the latency (ping) between you and the server. The graph's colors provide some additional information: green is normal, yellow indicates that the snapshot was delayed so that the server would not exceed the rate value (either rate on your client, or sv_maxRate on the server, whichever is lower), and red indicates that a snapshot was lost entirely (i.e. a snapshot sent by the server never made it to the client, probably due to network problems.)
http://www.themuffin.net/etpro/lagometer-snap.png
In the above image, arrow 1 points to a normal snapshot with a ping of about 130ms, arrow 2 points to 700ms of packet loss, and arrow 3 points to 2 snapshots that were delayed to stay under the rate limit.
Frame Graph
The frame graph is a little more complicated, and requires some background information about how Enemy Territory's network code works for a full understanding. In Enemy Territory, each client runs at a non-fixed frame rate (depending on configuration, system performance, etc.) while the server runs at a fixed rate of 20 frames per second. After running each frame, the server will send a snapshot to every client (so long as the client's snaps and rate settings allows it) describing everything that has changed since the previous snapshot. When the client receives this snapshot, it interpolates the values between the old snapshot and the snapshot that was just received--that is, it smooths out the movement so that things in the map don't appear to be jumping around when the client is drawing frames faster than the server is sending them. If the client doesn't receive a snapshot, it may have to guess where an object is going to be in order to keep things looking normal.
The client and the server each keep track of the current game time, and the differences between these times are expressed in the frame graph as well as object movement. For a simple example of this, imagine that the server has sent you two snapshots, snapshot a at time 12350, and snapshot b at time 12400¹, and then imagine that the client's current time is 12375. The client will interpolate² the position sent in snapshot a and in snapshot b to determine that the object in question should be drawn in the middle of the two points sent (because 12375 (the time our client is drawing for) is exactly halfway between 12350 and 12400.)
In the situation presented in the previous paragraph, imagine the client's time is 12425 and that no additional snapshots have been received yet. In order to maintain fluid motion, the client will need to guess where objects will be (using the last known position, angle, and velocity.) The calculation for this is quite not as easy to explain, so an example has been omitted for brevity.
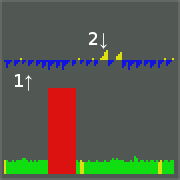
The frame graph in the lagometer represents how far the time used for currently drawn image is away from the most recently received snapshot, and whether the client interpolated or extrapolated to obtain the positions used. Normally, the client interpolates positions, which is represented in blue on the lagometer; the graph height will spike downwards when a new snapshot is received, then crawl upwards towards the baseline), although it will sometimes be yellow to indicate extrapolation (and the graph will crawl upwards away from the baseline as the client extrapolates farther and farther from the last known data.) Since the cl_timenudge cvar causes the world to be rendered a certain number of milliseconds behind or ahead of the client's internal time, negative values may cause extrapolation during normal gameplay. For example, in the first situation described above (where the client's time is 12375), a cl_timenudge value of -30 would end up pushing the time used for rendering up to 12405 (which is newer than the data we have), so a small amount of extrapolation (5ms) would be required here.http://www.themuffin.net/etpro/lagometer-frame.png
In the above image, arrow 1 points to an interpolated frame immediately after a new snapshot was received, and arrow 2 points to a frame where a fair bit of extrapolation was performed.
AntiWarp
If etpro AntiWarp is triggered, it the delay added by the antiwarp system is represented by translucent green bars in ths snapshot graph, like this
FPSometer
In etpro, cg_lagometer 2 replaces the standard ET lagometer with a graph of frame time. The bars hight shows the time required to render a frame, and they are color coded as follows
- Red > 35ms
- Yellow > 20ms
- Green <= 20ms
Footnotes
¹ Note the increase of exactly 50 -- remember that the server is running at 20 frames per second, so:
1 frame · 1000ms (1 second)
20 frames= 50ms ² This is technically called linear interpolation (the simplest interpolation method), which is sometimes abbreviated to lerping.


-
A lot of people I play Enemy Territory with have been contemplating switching to a version of the program called ET Legacy, and their reasoning is generally related to screen resolutions.
Wolfenstein Enemy Territory is a very old game, and the designers never conceived that it would ever be played on a 1920×1080 screen resolution, so it was never coded to have that option in the Video Settings.
That being said, you can make a few modifications to your launcher shortcut, and run Enemy Territory at true native 1920×1080 resolution.
Note: The only glitch I’ve encountered with this so far, is that when you’re changing video settings in the game, the game will not revert back to 1920×1080 without a game restart after a settings change (such as texture quality, dynamic lighting, etc changes). So, go set your quality levels for textures and everything prior to modifying your shortcut, then you should avoid encountering any of those issues.
Linux\Mac: You can use similar command switches on Linux or Mac to achieve this goal, but the process of editing the shortcut\launcher may vary.
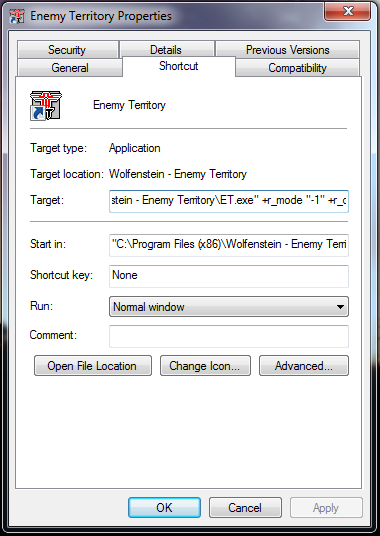
Right click your Enemy Territory shortcut, and hit Properties.
You’ll want to add these options to your shortcut:
(com_hunkmegs is not related to the video settings, but a few extra hunkmegs will help your game performance.)+r_mode "-1" +r_customwidth "1920" +r_customheight "1080" +cg_fov "115" +set com_hunkmegs "768" +vid_restart1+r_mode "-1" +r_customwidth "1920" +r_customheight "1080" +cg_fov "115" +set com_hunkmegs "768" +vid_restartYou can do so by adding them after the trailing quotation mark surrounding your program name, as show in the following screenshot:
My full shortcut application path is as follows, since it’s not entirely visible above. (The “Target” box above).
"C:\Program Files (x86)\Wolfenstein - Enemy Territory\ET.exe" +r_mode "-1" +r_customwidth "1920" +r_customheight "1080" +cg_fov "115" +set com_hunkmegs "768" +vid_restart1"C:\Program Files (x86)\Wolfenstein - Enemy Territory\ET.exe" +r_mode "-1" +r_customwidth "1920" +r_customheight "1080" +cg_fov "115" +set com_hunkmegs "768" +vid_restartAnd there you have it! Next time you launch Enemy Territory, you should be presented with a full screen 1920×1080 gaming experience. Enjoy!
-
IntroductionBasically there is two ways to setup your Enemy Territory
Vanilla Enemy Territory 2.60b.Best option for competitive ETPro mod players, since ET Legacy is not compatible with ETPro. No widescreen support
Modern port of Enemy Territory.Best option for non-ETPro players. Fully compatible with all mods (except ETPro) and 2.60b servers. Fully compatible with modern systems. Includes widescreen support, omnibots and various new featuresVanilla Wolfenstein ET
FIRST STEP:
Head to the Splash Damage website and download Wolfenstein ET setup. Links below:
Wolfenstein ET (Windows)[www.splashdamage.com]
Wolfenstein ET (Mac OS)[www.splashdamage.com]
Wolfenstein ET (Linux)[www.splashdamage.com]
SECOND STEP:
Proceed with the installation. Installation includes ET-Minimizer(to minimize the game) and Punkbuster anti-cheat. Install game intro if you want to.
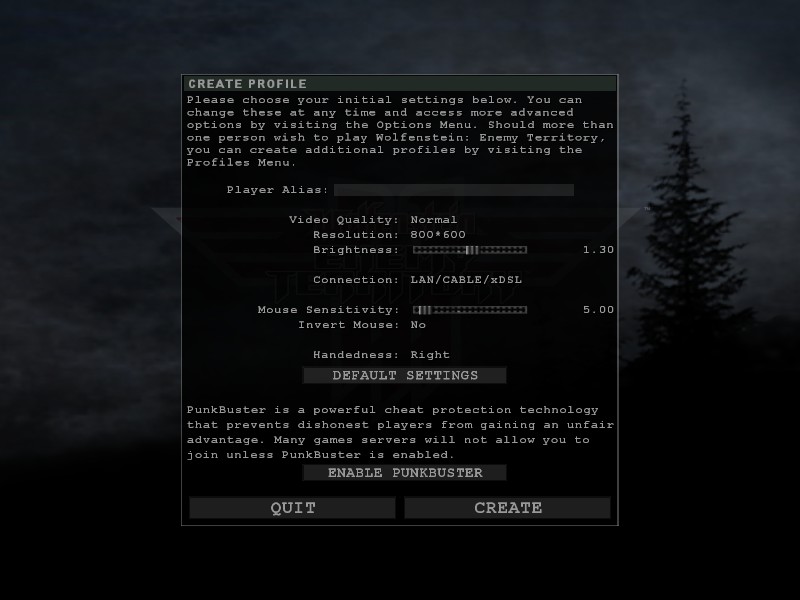
THIRD STEP:
Setup your in-game profile.
Don't forget to enable Punkbuster anticheat to be able to play on PB enabled servers(most of them are PB enabled).
Note:You can also use different colors in your nickname. Just type ^1(1 is number of color) before any letters you want to colorize. Use this color name generator[teammuppet.eu]Note:If you still want to use widescreen in the vanilla ET do this:
After profile and graphics setup open the console with ~ button. Type this commands:
/r_mode -1
/r_customwidth 1920 (your custom width)
/r_customheight 1080 (your custom height)
/vid_restart
Also you might want to play with your FOV. Try different values.
/cg_fov 100
However weapons first person models will still look odd, since there is no native widescreen support in the game.
Your widescreen setup can reset if you change anything in the graphics menu. So setup everything there before widescreen commands.
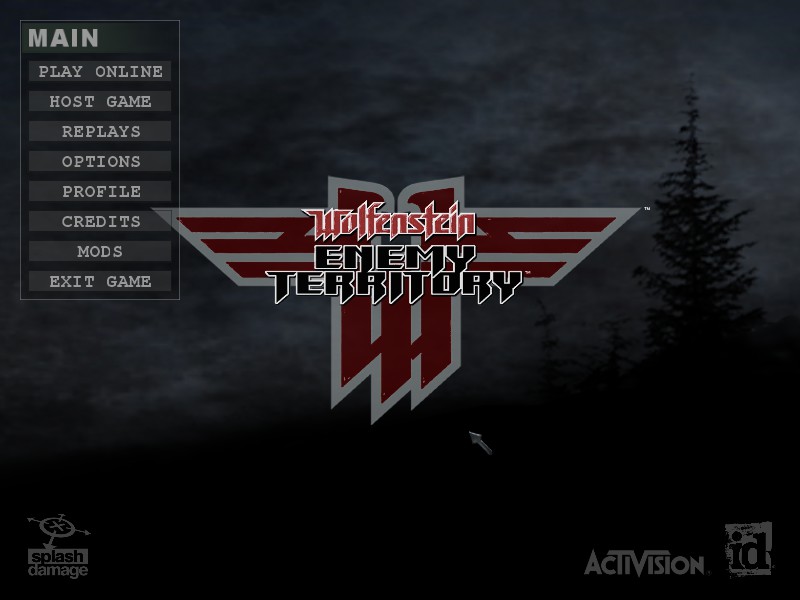
FOURTH STEP:
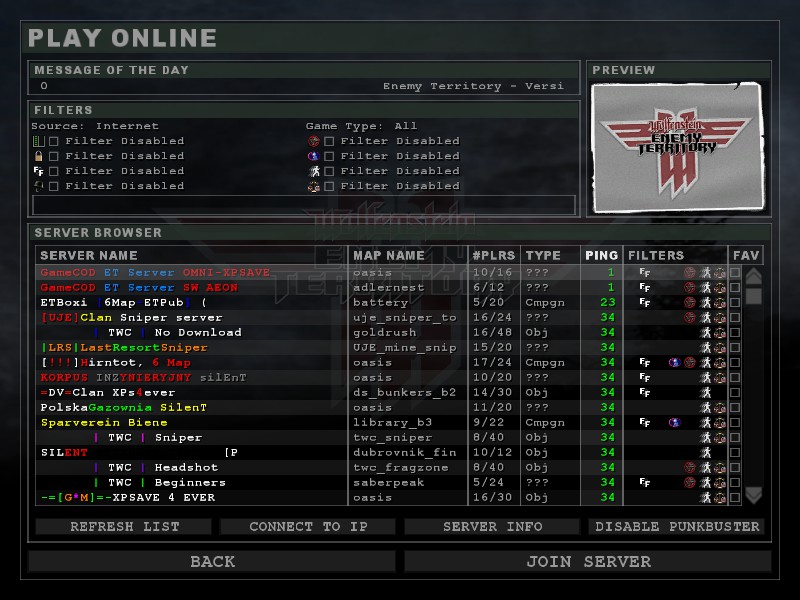
Getting into the game. Click on the PLAY ONLINE button in the main menu.After that you will see a server browser. You can try to find servers there.
But most of the servers are bots only. So it is kinda hard to find any populated servers with human players.
What you wanna do is head to the ET Server List[et.splatterladder.com] and find a decent non-bots servers for yourself. After that simply click the CONNECT TO IP button in the in-game browser and put your ip there and you will get into game in no time.
Note:I highly recommend [!!!]Hirntot, 6 Map server. It features ETPro, 6 vanilla maps and stable community without any bots. IP is 193.192.59.186:27960. See you in the game!ET Legacy
FIRST STEP:Grab your ET Legacy Installation file from here:
ET Legacy[www.etlegacy.com]
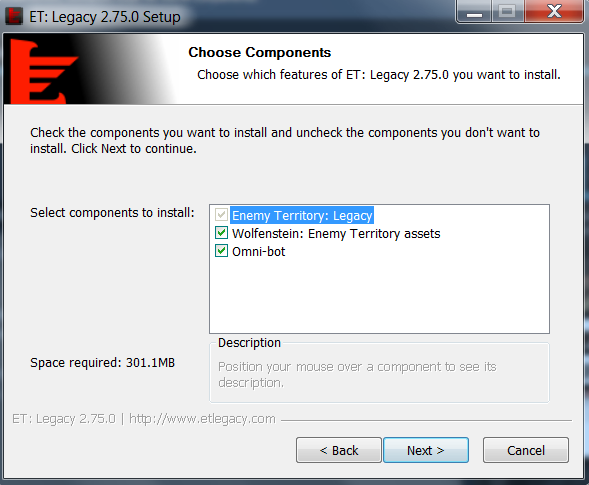
SECOND STEP:Proceed with the installation. Install omnibot if you want to. If you don't have original ET installed, install ET assets as well.
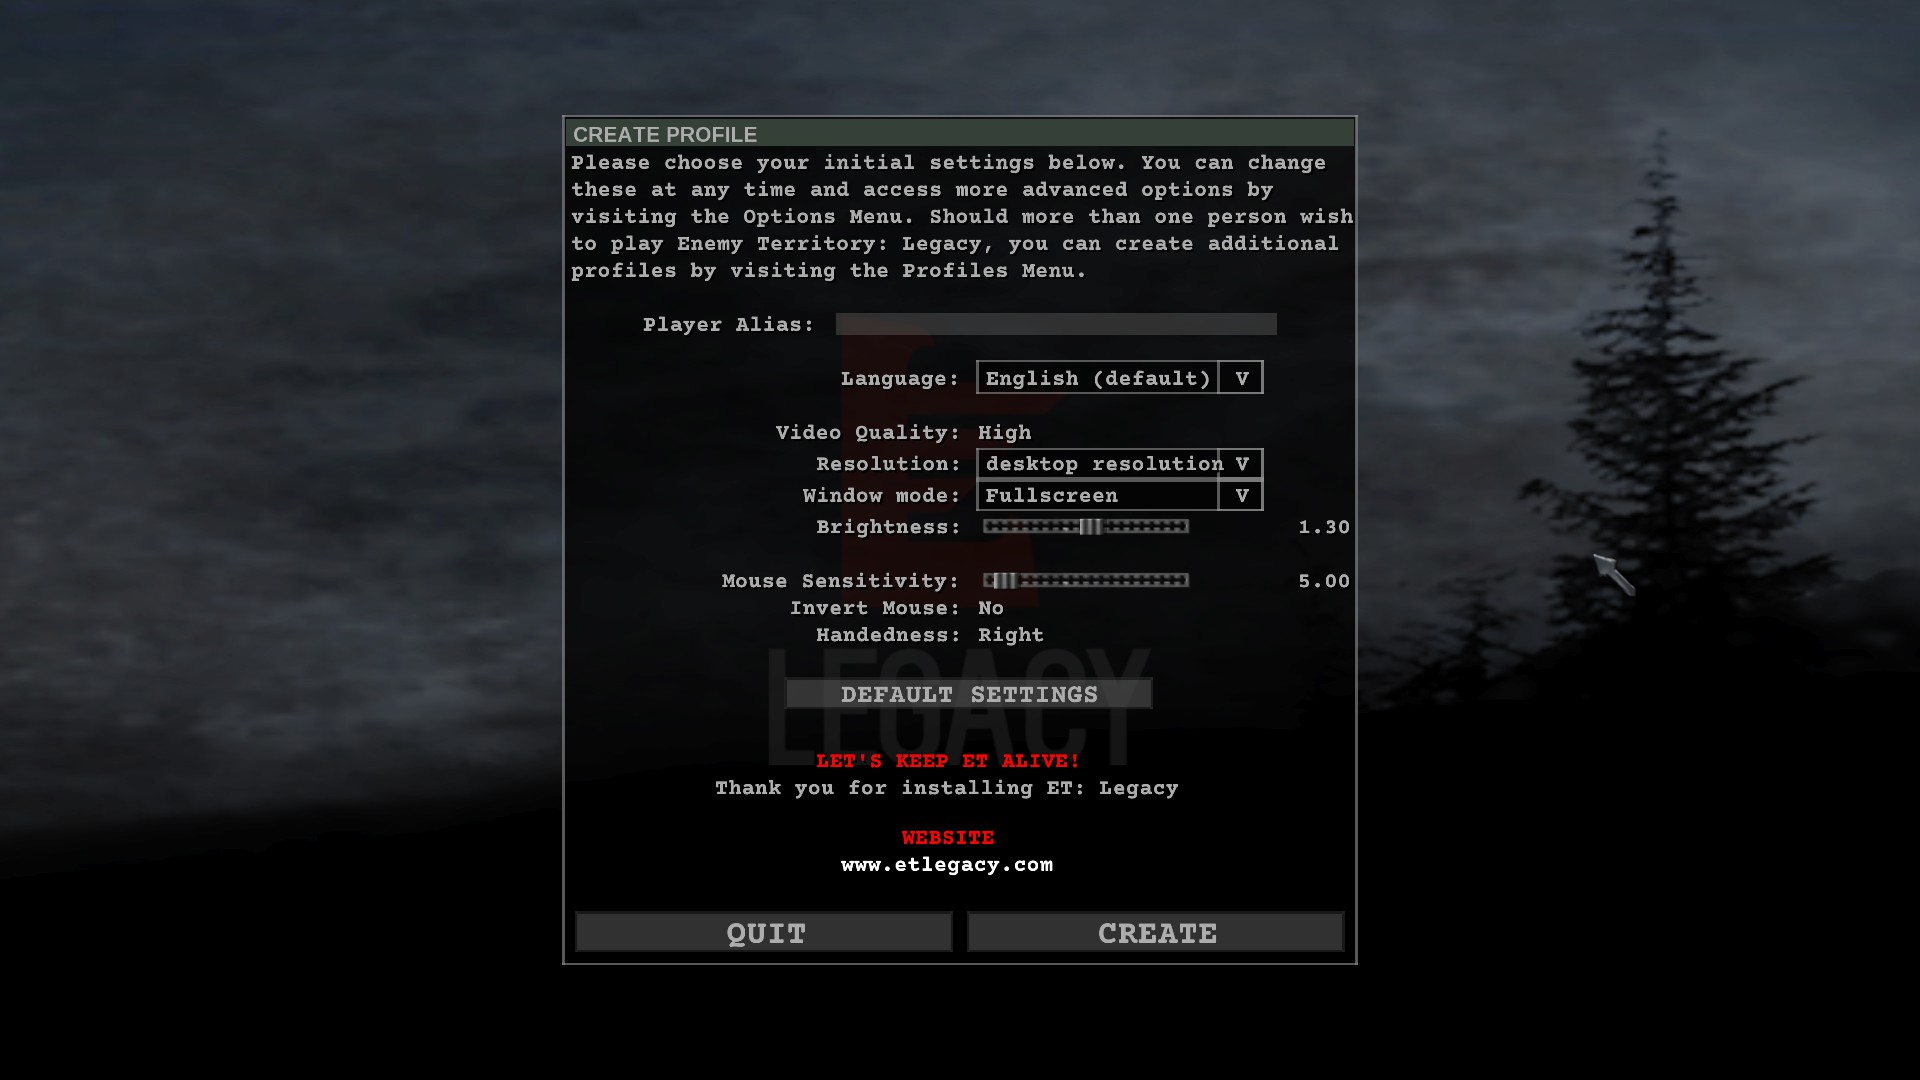
THIRD STEP:Setup your in-game profile. As you can see there is no Punkbuster Anti-Cheat option, since PB is not compatible with ET Legacy.
ET Legacy supports different widescreen resolutions so there is no need to setup widescreen manually like in Vanilla ET. Weapons first person models will look normal, since there is native widescreen support in ET Legacy.Note:You can also use different colors in your nickname. Just type ^1(1 is number of color) before any letters you want to colorize. Use this color name generator[teammuppet.eu]
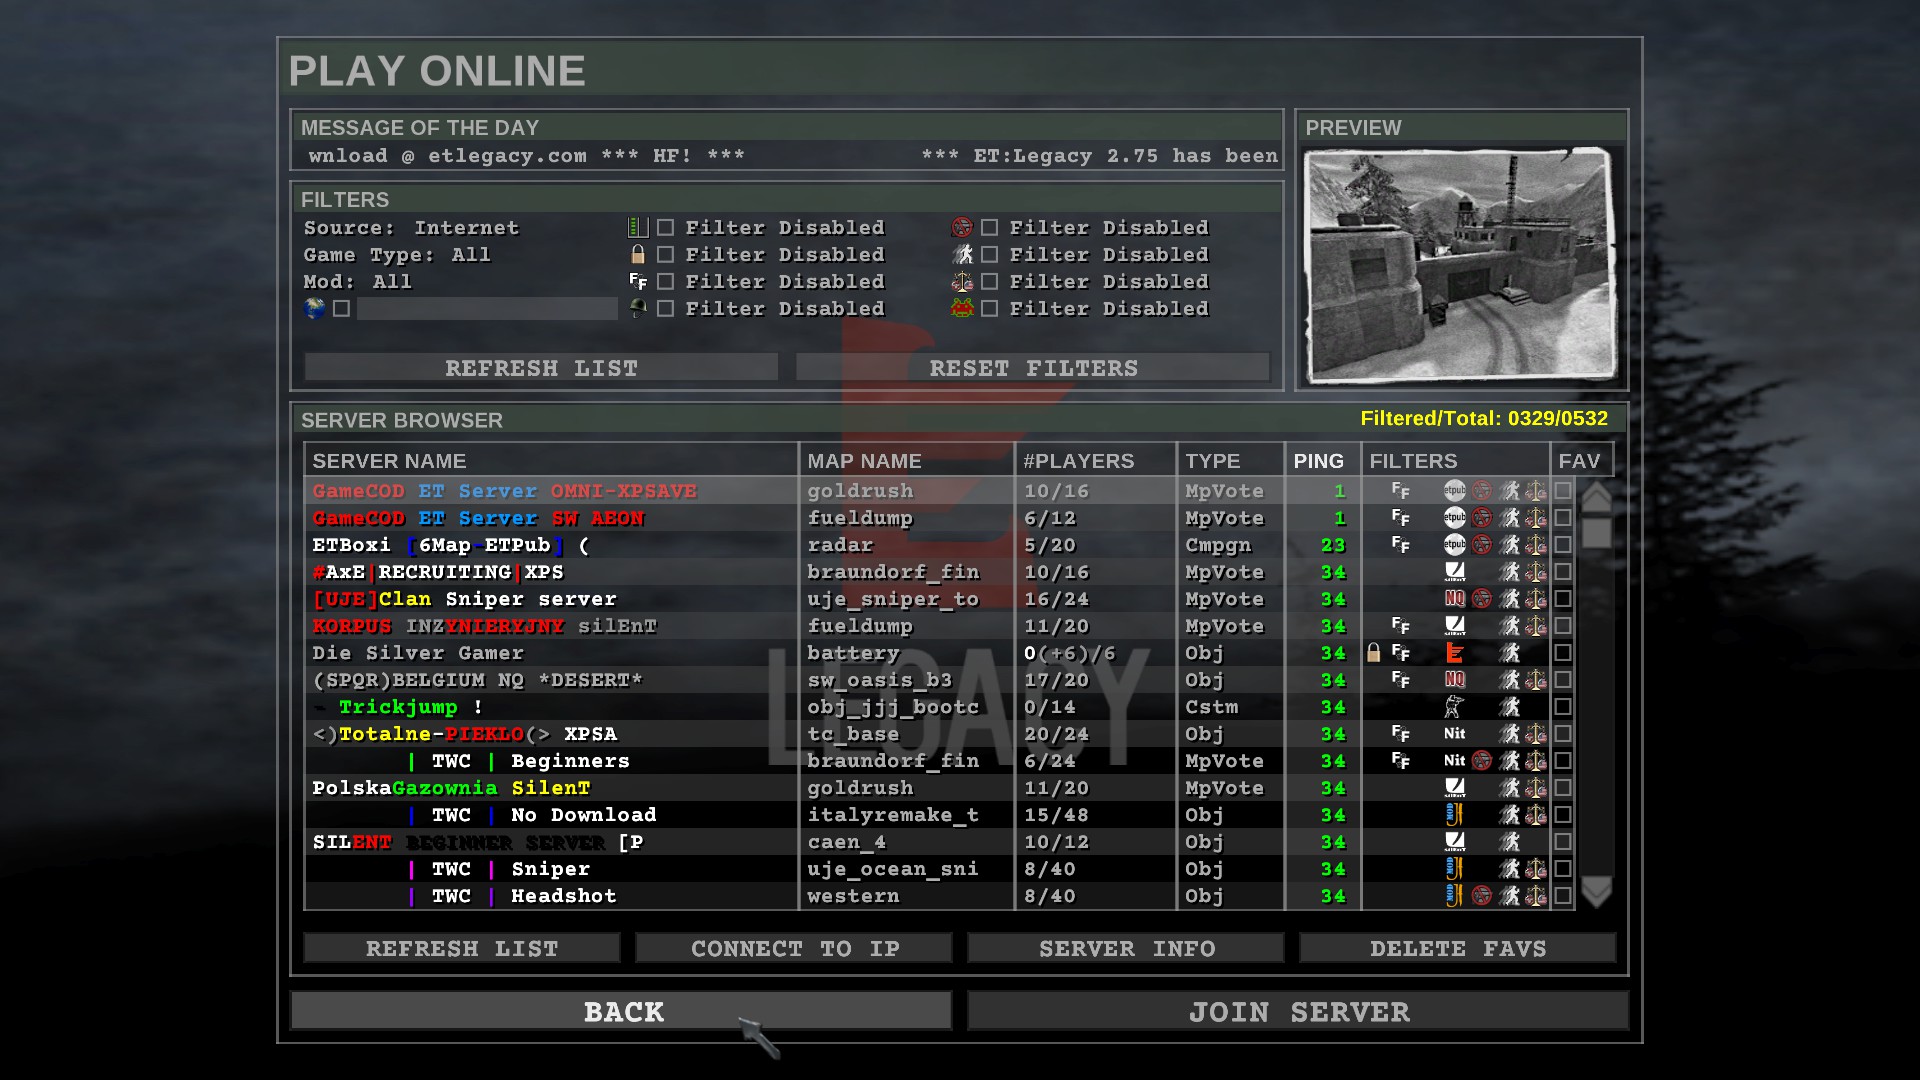
FOURTH STEP:Getting into the game. Click on PLAY ONLINE button in the main menu.
Use the in-game browser to find servers. ET Legacy has in-build mod filter. Make most use of it. Most of the alive servers using ETPub, siLent, Jaymod and Noquarter mods. ET Legacy is compatible with all mods except ETPro.
Also there is bot filter in the server browser. example
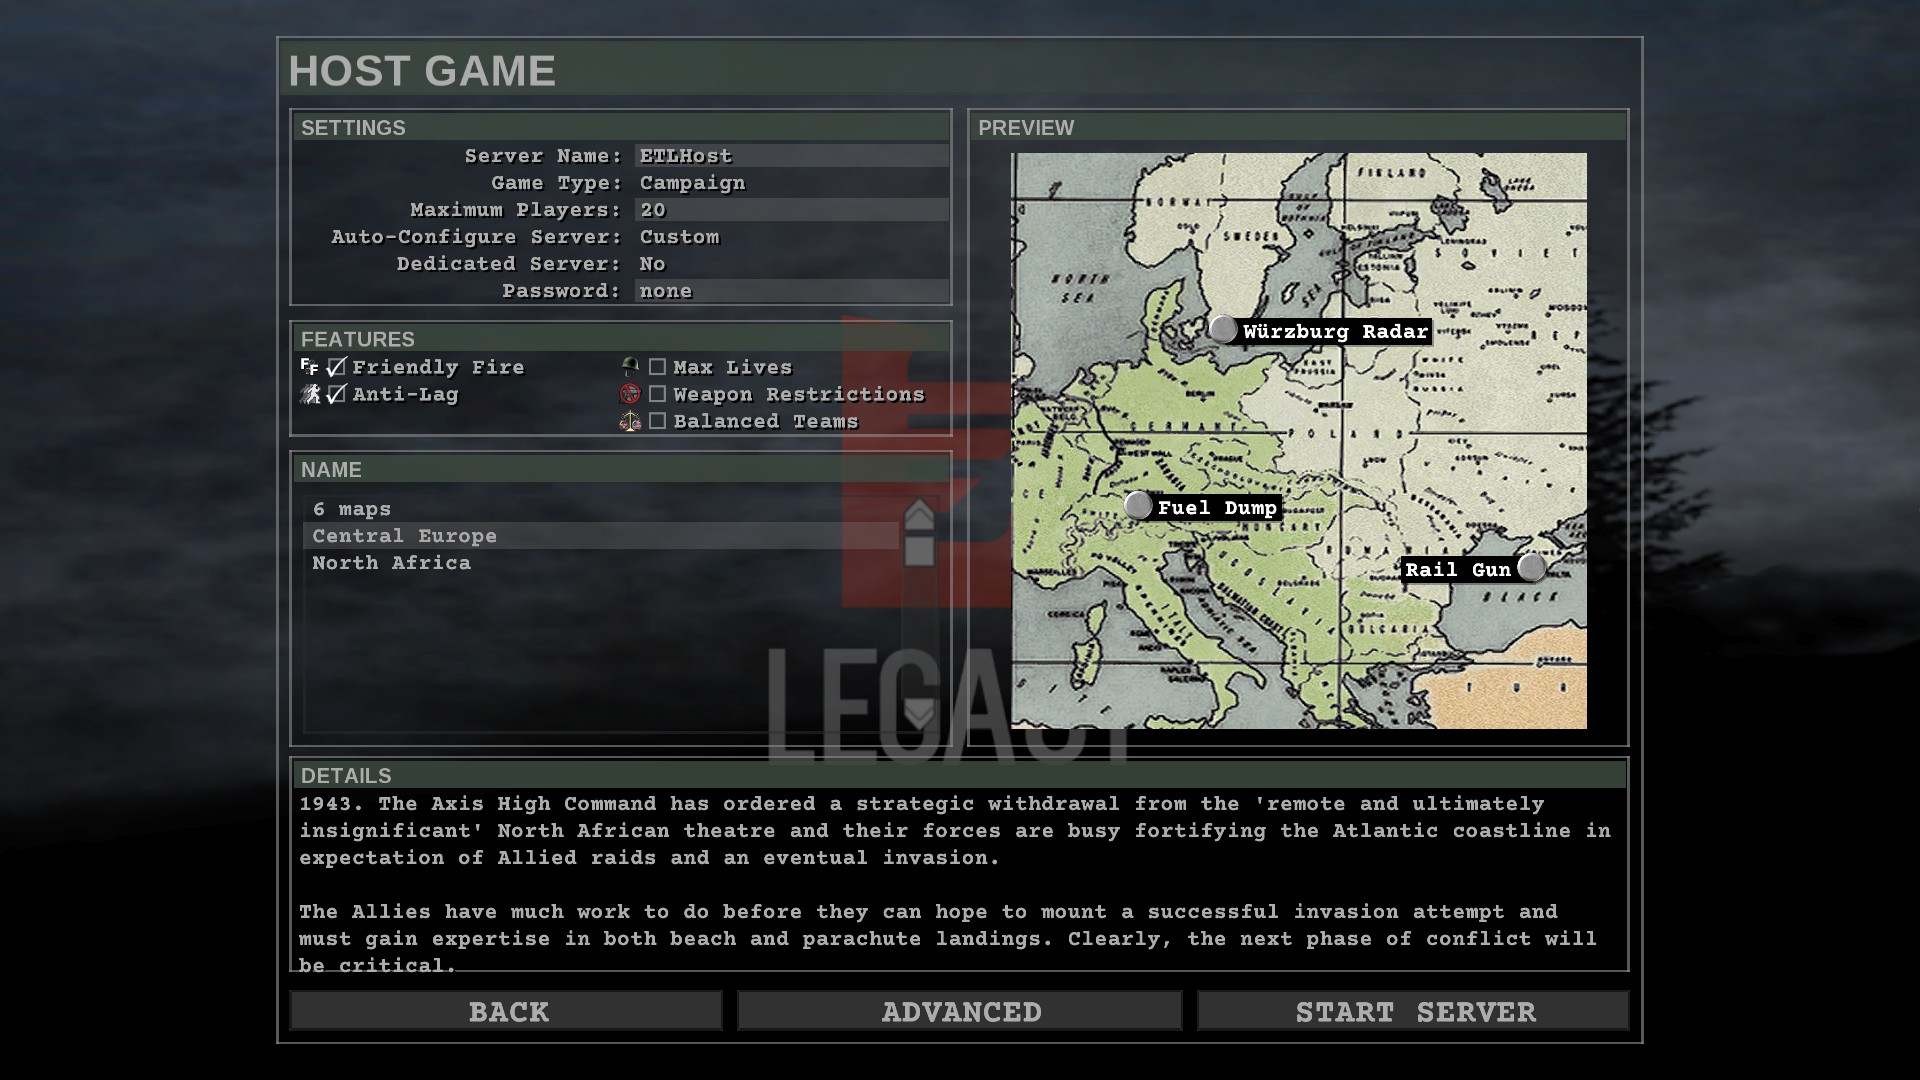
OMNIBOT SETUP IN ET LEGACY:If you want to play with bots click on the HOST GAME button in the main menu.
This will bring you to this screen.Setup your server as you want and then click on the START SERVER button.
In the game open the console with ~ button and type this command:
/omnibot_enable 1
Restart your server. For example change the map with referee menu. Type this command in console:
/bot addbot
This will add 1 bot on your server.
You can change difficulty level of bots with /bot difficulty command. (from 0 to 6)
Full bots command list[omni-bot.invisionzone.com]
This is all you need to know to get into Enemy Territory. I will update this guide with additional tips in the future. -
uthor Daredevil
1. Get stable fps. Stable fps is very necessary to make u mouse movement smoother. With this you can see your connection problems and hardware related things.
set cg_lagometer "1"

set cg_drawFPS "1"
Now after you can see u stable/average fps use this to cap the fps.
set com_maxpfs "put the number of fps here"
fps can bec caped from 44 to 333. “PB Limitation”. 43 fps is not allowed due to low recoil explocit.
2. Disable particals and all because it want help u much and it gives slight boot in performance.
set cg_wolfparticles "0"

set cg_atmosphericEffects "0" //

set cg_shadows "0"

set cg_marktime "10000" // I personally use it on medium time so i can see where mortar has been hitted or where landmines are blasted.

set cg_showblood "0"

set cg_bloodFlash "0"

set cg_gibs "0"

set cg_coronas "0"
3. This would help with your aim.
Use low sense as much as u can.
sensitivity "3.0"

Sense number can be changed from 0 to 30.
Crosshair shouldnt be pulsing.
set cg_crosshairSize "60" //size of u crosshair change according to u resolution

set cg_drawCrosshair "5" //change no. for different crosshairs u like.

set cg_crosshairPulse "0"

set cg_crosshairColor "white" // u can also use red,cyan, try whatever u like.

set cg_crosshairAlpha "1.0"

set cg_crosshairColorAlt "black"

set cg_crosshairAlphaAlt "1.0"

set cg_crosshairHealth "0" // should be zero if u are trying oth
er colours
Use high fov to see more.
set cg_fov "100" // u can use any number from 90 to 120.
This removes the hit effect upto some extent.
set cg_bobup "0"

set cg_bobpitch "0"

set cg_bobroll "0"

set cg_runpitch "0"

set cg_runroll "0"
Some people like to see gun and bullets…and some dont.
set cg_drawgun "0" // Use 1 to enable it again.

set cg_muzzleFlash "0" //
4. Hardware related. No map uses more then 100Mb hunk but i use this one. Please, use atleast above 128Mb hunkmegs. If you low RAM dont both to mess with this cvar.
set com_hunkmegs "192"
If u are having avg 40 fps then to get more use this..
set r_lodbias "2" // use this only when u are having lower fps. With this u game look would be crap but increase in performance a bit.

set r_lodCurveError "250"

set r_mode 4 // for 800*600 resoution = 4.

set r_textureMode "GL_LINEAR_MipMap_NEAREST"

set r_drawsun "0"

set r_fastsky "1"
5. For admin commands use this.
bind , say !spec999

bind . say !cancelvote
DONT USE !SPEC999 IN THE START OF THE MAP FOR ATLEAST 3 MIN
For lagging or modem laggers..
You can always do players in console and see if anyone one is on modem aka 5000 rate or not.
set lag1 "say To fix u lag and ping plz do this:;set lag vstr lag2"

set lag2 "say Esc-Options-System-Networking-[Lan/Cable]-Apply;set lag vstr lag3"

set lag3 "say Esc-Options-System-Networking-[Lan/Cable]-Apply;set lag vstr lag1"

set lag "vstr lag1"

bind / vstr lag
6. Jaymod cvars
//My personal preference.. u can change according to u's.

set cg_drawSmallPopupIcons "1"

set cg_drawFireteamOverlay "1"

set cg_drawDisconnectIcon "1"

set cg_drawWeaponIconFlash "0"

set cg_drawclock "1"

set cg_popupWaitTime "4000.0"

set cg_popupFadeTime "0.0"

set cg_popupTime "0.0"

set cg_numPopups "3"

bind p messagemode4 // for PMing friends..
If you do anything wrong or dont want it and dont know how to revert back exec default cfg and it will set ALL TO DEFAULT.
exec etconfig.cfg

This will set to everything default.
Your cfg file shouldnt be over 15kb or it want work. Their are tons of cvars which i havent typed down. Use google for that. But basics are explained.
If you want explore more here is the link.
If you want to connect to our server directly instead of finding it in the list u can use this:
Make a shortcut on desktop and use it for connecting to different servers. Right click on the shortcut > Properties > Shortcut > Target
It would be like
"D:Wolfenstein - Enemy TerritoryET.exe"
change it to
"D:Wolfenstein - Enemy TerritoryET.exe" +set fs_game jaymod +connect 8.9.4.227:27960
Advanced version for connecting server with u config files.
For PUB. Make a shortcut and use it directly to join PUB instead of finding in the list.
"D:Wolfenstein - Enemy TerritoryET.exe" +set fs_game jaymod +exec daredevil.cfg +connect 8.9.4.227:27960
Same for ETPUB
"D:Wolfenstein - Enemy TerritoryET.exe" +set fs_game etpub +exec daredevil.cfg +connect 8.9.4.227:27960
Now, what if u load u game from Et.exe and not the shortcuts? U want be able to get u settings. So, u can make an autoexec.cfg and put in etmain folder. Now, autoexec.cfg file should only contain 1 line and that is “exec daredeviljay.cfg”. So, it will execute daredeviljay.cfg and not the default one.
So, in short u etmain would have 3 cfgs.
daredeviljay.cfg — for jaymode
daredeivlpub.cfg — for etpub
autoexec.cfg — if u start u normal et.exe and not the shortcut ones.
Also i have added ET Minimizer. Just run this file before u join the game. To minimize the game use Alt + Z and use Alt+Z again to restore it.
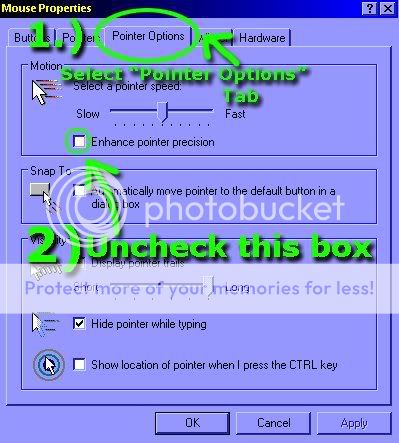
Disable the windows acceleration in the windows so u mouse will move exactly same all the time.
Now, finally what mouse you need if u have money or need to buy new one. Here are all the reviews.
For ETPUB/ETPRO Mode:
ETPUB offers the map specific config client side also. So, by this way u dont have to do anything and u crosshair colour would change depending on the map and u can also change many more things if u want. Config will be execute everytime that map starts.
For most of the white maps i use red colour and for others white dot.
Quote
Autoexec Files
The etpub client now has the ability to automatically execute certain config (*.cfg) files upon certain events:
autoexec_allies.cfg, autoexec_axis.cfg, autoexec_spectator.cfg
Executed when you join a team (or become a spectator)
autoexec_.cfg, autoexec_default.cfg
Executed when the map switches to . autoexec_default.cfg is always executed after the autoexec_.cfg file.
autoexec_soldier.cfg, autoexec_medic.cfg, autoexec_engineer.cfg, autoexec_fieldops.cfg, autoexec_covertops.cfg
Executed when you switch classes
Please note that if any of these files do not exist they simply will not be executed, there will not be any error messages
Also note that these filenames are casesensitive on linux
For watching the demo:
1. Start ET.
2. Connect to same mode server and enter the server. If demo was taken from jaymod join jaymod and disconnect.
3. In the menu options click on replay. Select demo and click on view.
Advanced Guide:
1. Change u command line.
for your et exe
2. Start ET.
3. Will directly load mode and connect to server.
I have 5 shortcuts like it. Click and connect.
For other games:
Here is how my looks:
"D:Wolfenstein - Enemy TerritoryET.exe" +set fs_game etpub +exec hellj.cfg +exec etpub.cfg +name "^4etnoob" +connect 209.247.83.71:27960
+exec loads u config.
+name sets u name.
+connect is for connecting to server
+fs_game etpub – etpub
+fs_game etpro – etpro
+fs_game jaymod – jaymod
-
-
Developed by “Splash Damage” Wolfenstein: Enemy Territory is a direct sequel to legendary first-person shooter video game “Wolfenstein: Return to Castle”. Enemy Territory is a dedicated Multiplayer game and it is still as popular as Counter Strike nowadays.
Plot is set at the World War 2 when the Europe was divided into two hostile groups namely “Axis” and “Allies”. This game does include some real locations of Germany and real weaponry used by Nazi’s in World War II. You walk into the game by choosing either side i.e. Axis or Allies. There are total of four Game-types that Enemy Territory offers, namely “Single-map objective”, “Stopwatch”, “Campaign” and “Last-man standing”.
While playing any of the Game-types mentioned above, you can either become a “Soldier”, “Engineer”, “Medic”, “Field Ops” or “Covert Ops” in order to fight for respective teams.
Capabilities of characters:
1) Soldier: A soldier is equipped with lots of guns, he can choose any one gun/weapon at a time from the given list:
- Thompson (Held only by a Soldier from Allies team)
- MP 40 (Can be Held only by a Soldier from Axim team)
- Flame Thrower
- MOBILE MG42
- MORTAR
- PANZER FAUST
Other than any one of the weapon from above, a Soldier has a knife, a pistol and four hand-grenades.
2) Engineer: An Engineer is the only person in the game who can plant dynamites and Land mines. Other than that he is equipped with a knife, a pistol, hand grenades and a choice to select any one gun from the following list:
- a. Thompson (Can be Held only by an Engineer from Allies team)
- MP 40 (Can be Held only by an Engineer from Axim team)
- c. M1 GARAND (Can be Held only by an Engineer from Allies team)
- d. K43 (Can be Held only by an Engineer from Axis team)
3) Medic: A medic can make alive the dead members by giving them injections and can provide health to the wounded members of his team. His default health is 123HP; He can either choose a Thompson or a MP 40, each with just 30 bullets depending upon the team he is playing for.
4) Field Ops: They are somewhat similar to Lieutenants of Wolfenstein: Return to Castle. Field Ops can:
- a. Call for Air Support,
- b. Provide Ammo to other team members,
Apart from these abilities, he can either choose a Thompson or a MP 40, depending upon the team he is playing for.
5) Covert Ops: They are the most advance members of the team equipped with modern weapons. Covert Ops can:
- a. Destroy the Command Post and Assault Ramp by the use of remote controlled bombs.
- b. Can drop smoke pallets.
Apart from these abilities, Covert Ops can choose one gun from the following list:
- Sten
- FG2 (Can be used as sniper)
- K43
Tips and Tricks
Among all the Game-types offered by Enemy Territory, “Single-Map objective” is the most played and most exciting game-type. And even in “Single-map objective”, the Seawall Battery, Fuel Dump, Rail Gun and Wurzburg Radar are the most extraordinary stages. Here are some tips and tricks regarding selected stages for 5 players each side game.
1) Seawall Battery:
a) Playing as an Axis team:
While playing in Seawall, the Allies team is in advantage. Tips for Axis team are:
- Choose the combination of 3 Covert Ops, 1 Field Op and 1 Engineer in the beginning.
- All the Covert Ops should select FG2.
- One Covert Op each should keep an eye on the enemies through the window in the forward bunker and the window opposite to it, while the other players make sure that assault ramp is not constructed.
- Once the Assault ramp is constructed, send the engineer to “Siegfried” (the Axis battery), while the other Covert Ops should try to destroy the Assault Plant with the help of remote controlled bomb.
- Always use the Axis-only gates to reach the “Siegfried” (the Axis battery), as it is the shortest way to reach the target that Axis should safeguard.
- In case enemy crosses the assault ramp, do not march outside the forward bunker, alive players of axis team should not allow the Allies to capture the forward bunker.
- Once forward bunker is captured by Allies, try the combination of 1 Medic, 1 Field OP and 3 engineers (all with K43 gun); and try to re-capture the forward bunker.
b) Playing as an Allies team:
- Choose the combination of 2 soldiers, 2 engineers and 1 Covert Op.
- At least one soldier should carry the “PLANZER FAUST” to clear the gun-shots coming from forward bunker, while the Covert Op should clear the path for the engineers to construct the assault ramp.
- Once the Assault ramp constructed, don’t let the Axis to destroy it; Covert Op should clear the man at the left window situated just opposite to the forward bunker so that the engineers may cross the assault ramp and capture the forward bunker.
- Once the forward bunker is captured, you have already won the 70% of the battle; either 1 Covert Op or a Soldier should guard the back door of forward bunker so that Axis can’t re-capture it.
- Engineers should plant more than one dynamites at “Siegfried” (the Axis battery).
-
Here are some basic tips to shoot with higher accuracy and with more headshots. I know I'm not the best shot around but these are basic tips that would help anyone who is new or open to some suggestions.
1. Get a good sensitivity
Depending on the type of mouse and the default windows mouse settings you use, everyones ideal mouse sensitivity differs. The best way I feel to get the best sensitivity is to join a server and start with a low sensitivity and slowly raise it until you feel comfortable shooting AND moving. Having a super low sensitivity will give you super "great" aiming skills at midrange, but players aren't always a decent distance away. The key is to find a balance between what feels comfortable aiming at a distance and in up close battles as well as moving around the map.
2. Keep your head up
This is probably the most important and basic tip ever given to me when playing. When moving through the map, keep your crosshairs headlevel in all circumstances. This will greatly increase your headshots and give you an advantage to others who have to drag their crosshair up to the head. I'd say 75% of the time when getting the first headshot, you will win the fight if you can just hang on and get a few body shots afterward. Remember, 3 headshots at close range will do the job.
3. Expect the enemy
If you know where the enemy is typically is coming from, keep your crosshairs at headlevel at that position. When they run around the corner, you have a two headshot advantage against them. Always note where the hotspots are and keep the crosshair in those areas when running through.
4. Crouch, crouch, crouch
When you are shooting at a distance, crouching gives you a more accurate shot. By crouching, your shots will land closer to where your crosshairs are with less spread. Moving side to side while crouching makes it harder to hit you because the hitbox for your head is awkward and makes it tough for players to hit. Also, a tap crouch technique is useful in battles that are upclose because many players aim for the head, and by crouching they completely miss you giving you a few extra shots to take them down.
5. Burst fire
With a thompson or mp40, burst fire doesn't feel like it would give you any type of advantage because in most situations you feel like you need to unload your clip to take down the enemy. But the truth is, burst fire gives you more accuracy and will help your shots have less spread and hit with a higher %.
6. Tracking
I can always tell if a player is truly skilled by watching them track players from a distance. Good players can tear apart 4 or 5 players from the side by tracking their motion. While the players run past without noticing you, a good player can track their head with their crosshair and take them down in less than 10 shots.
7. Keep moving
When shooting others, stay constantly moving if you feel vulnerable. Moving doesn't seem like it would help your aim, however if done correctly, it gives you a great advantage. Using sprint while moving in a irregular pattern back and forth makes you harder to hit therefore helping your aim.
8. Crosshair/field of view
Edit the crosshair by hitting esc. Many good players use the small dot because it gives you an accurate crosshair without all the extras. I prefer the dot with the ring around it. Use a color that contrasts against the background of most maps, such as limegreen or red. Some players change the crosshair on certain maps such as fuel dump or radar to give them the best contrast. Change the field of view by typing /cg_fov 100 in console. You can select from 90-120ish area (not exactly sure how high). The best fov I've found was around 100-105. Raising your fov too high gives you a disadvantage at a distance, however going too low, around 90, gives you a disadvantage to upclose battles. There is a script that allows you to toggle fov by scrolling that is often used but is pretty silly I think.
9. Turn the sound off
Yeah this sounds stupid, but I've found it really helps me. Turning the sound off makes you rely on your sight and helps you focus on purely shooting. Sure this isn't very advantageous in most situations, but it really does work. If you are getting owned by some guy and its pissing you off, hit the mute button and take him down. Try it.
10. I can't think of a 10th tip.
If you only could only take home one tip given above, use #2. Keeping your crosshairs at headlevel is something almost noone does and it makes an immediate difference.
-
In Wolfenstein: Enemy Territory you do not necessarily shoot at where your cross-hair points: like in real life bullets do spread. There are three dimensions where you should know the details to master spread and improve your accuracy and aiming: (A) the game engine, (B) your setup/configuration and (C) your way of playing.
But now to the insights…
(A) The game-engine and weapon-spread
In ET the spread of your standard weapons (mp40, Thomson, Luger, colt, Sten, …) is affected by 5 factors:
-
View: moving your cross-hair / looking around increases spread
The more you move your cross-hair around, the more weapon spread you will get. In times you move your mouse, spread increases while in times you don’t move your mouse, it will decrease steadily. Player velocity does not have any impact on spread of unscoped weapons. You can see the size of your weapon spread by activating cross hair-pulsing for example:set cg_crosshairPulse 1 // activate cross-hair pulsating
set cg_drawcrosshair 4 // cross-hair: little spot in center plus pulsating circle around it
big hitboxes (jaymod): hitable behind a corner
So be aware of the ET’s hitbox model (hitboxes are much bigger than the models which makes some cross-hair-movement unnecessary) and reduce cross-hair-movement to a minimum. Especially avoid erratic mouse-movements and trace as smooth as possible. RaZiel mastered the idea of aiming like this – have a look at his tutorial.
-
Shooting: continuous shooting increases spread
Short range fights usually don’t last long and every hit is crucial, so in most cases you are forced to shoot continuesly and shooting bursts is no option. Long range combats often last longer. Shooting small bursts of 3 to 5 bullets each should be considered if you can’t start of the fight with doing massive damage to your opponent. Concentrate on short range duels to get the maximum out of you rounds. -
Receiving Damage: getting hit by bullets increases spread
When you get hit by your opponent, your screen shakes. This will hurt your aim. Further more the knock back will raise weapon spread (analysis/implications from overdrive). Both make it inevitable for you to do your best not to get hit – strafe with and without stamina, use obsticles as cover, crouch, prone, … -
spread
Movement: crouching and proning decrease spread while beeing in the air dramatically increases spread
[GORE]Hallelujah did an analysis on how movement affects weapon-spread back in 2003. He found out that spread in standing/crouching/proning-position is nearly equal, when you fire small bursts of 2-3 bullets. If you fire continuously, the spread of crouching and proning is still the same but in standing position it is much higher (see screenshot). Further more Madscientist found out in his analysis 2006 that crouching will reduce spread to 50% from standing position. Being in the air (jumping, free fall, strafing on rough terrain, …) will result in twice the maximum spread you get when shooting in standing position. And proning will give you maximum spread for the first second and then decays to half the spread as crouching does. -
Experience-Points: light weapons level 4 and covert ops level 3 decrease spread
When you receive light weapons level 4, your weapon spread will reduce by 35%. (Note that it is level 4 and not level 3 like the manual says as [GORE]Hallelujah points out). Further more covert ops level 3 reduces spread by 35% for the Sten and the FG42. Interestingly this spread reduction seems to be transportable on the standard-weapons and also combineable with light weapons level 4 for maximum spread reduction (see analysis again from [GORE]Hallelujah). You should be aware of that to be able to evaluate your own aim and that of others on the server (e. g. if you join a server with players who have many XP). -
Your weapon choice: the MP40 (Axis) seems to have slightly less spread than the Thomson (Allies)
Spread: MP40 vs. Thomson
Ifurita from planetwolfenstein did an analysis some years ago in RTCW on how many rounds a weapon is able to fire per second. He found out that the MP40 has a slightly higher firering rate than the Thomson (~ 6 vs. 5 rounds per second). You should now probably expect compensating the Axis advantage by having more spread. On the contrary: from the screenshots he made you can conclude that the MP 40 also has slightly less spread when fired in small bursts from 3 to 5 rounds. Of course all on the condition that the analysis is a.) correct and b.) also applies on Wolfenstein: Enemy Territory.
(B) Your Config
- Mousepad/-underground: Make sure your mousepad is clean and you just a minimum friction between pad and your mouse. The more friction, the less smooth will be your mousemovement.
- Sensitivity: a sensitivity of zero would reduce weapon spread due to crosshairmovement to zero of course. But that wouldn’t be practical. 😉 Low sensers have got some advantages considering weapon spread. So they usually also do more headshots than high sensitivity users. I use a sensitivity of 5 in connection with pointerspeed 6 of 11 in windows xp which is very high, but manageable. See the Aiming by RaZiel-Tutorial for finding your sensitivity.
- FPS / Frames per second: As overdrive states in his article, FPS increases recoil and your mouse will react a lot faster the higher the frames per second. Keep your FPS high, but as stable as possible at the same time. I have a quite old computer and thus I use com_maxfps 76. In most maps I can archive a stable FPS like this.
- Mouserate: the higher, the smoother your aim can be. Basically you can chose between USB and PS/2. RaZiel stated 2003 that for him PS/2 worked better than USB, because with his Logitech Mouse he het a.) a higher mouserate of 200hz and b.) a more stable one that with USB (120hz). Overdrive stated 2006 in his article, that nowadays for most mice USB would be more suitable than PS/2 and that you can archive 450, 500 or even 1000hz. I myself use a Logitech MX518 with 200hz and inputbufferlength 100 on PS/2. With USB I could only get a maximum of 120hz. To check how often your mousedata gets refreshed check mouserate.exe from that RaZiel-Package (Tools-Folder).
- FPS > mousrate: Madscientist found out about the phenomenon that spread due to cross-hair movement will decrease when you got more frames per second than mouse signals per second. This sounds logical as some for some frames the game engine cannot register any mouse movement which results in decreasing spread. Turn spread can be even reduced to zero (!) when FPS is twice as high as the mouserate. So if you put your mouse on USB with standard polling rate of 125hz and you have constant 250fps – … lucky boy! 🙂
- Mouse-DPI / -Dots Per Inch: the more dpi, the smoother your aiming can be. But be aware of a little bug in the quake-engine that causes negative acceleration with high DPI.
-
View: moving your cross-hair / looking around increases spread
-
Maps in Wolfenstein: Enemy Territory contain many elements that you should use to your strategic advantage in firefights. One of the (if not the) most powerful of them: corners. You probably know the situation where some opponent pops up unexpected behind a random corner, shoots you down without giving you any chance and you slam the mouse while shouting “lame corner-camper”…
But let’s have a closer look at
- why are corners so powerful
- why it’s not lame but clever to use them
- how you use them best
@1: As LXasylum points out in his RTCW-movie “how to achieve maximum accuracy”, corners are both an offensive and a defensive weapon. You can lean behind a corner a see whats happening and how many opponents come towards you so you know more than they do which is always a powerful advantage (e. g. let them eat a nade). When you pop up unexpetedly behind a corner you got…
- stamina to strafe which makes you warpy and often harder to trace with the crosshair for you opponent,
- you surprise them which makes you most likely the one to give damage first,
- you may – in narrow ways (think of tc_base, battery, …) – additionally benefit from them doing team damage to each other while standing in line one after another and you’ll be the one who gives damage first when one opponent falls and the next in line is under immediately your crosshair while you continue shooting without interruption
Further more: as fast as you appeared you can also disappear again behind the corner to a safe place to heal you, reload, draw a grenade, etc. which makes a powerful defensive aspect of corners.
@2: I hear people often say it is lame to camp behind corners. That is honestly total crap. First: if you are an experienced player you expect opponents to pop up everywhere – especially corners. And thus you can anticipate it. And second: you can also camp behind corners and do the same. In order to get a good efficiency (which is the relation from kills to death or damage given to damage received), corner camping is a very strong and no lame means. 😉
@3: The means of camping behind corners is most effective, when it is totally unexpected to your opponent. To make and leave it unexpected: vary your positions! But also keep in mind that you don’t get the maximum out of the game if you just camp behind corners, if you just sit and wait… Play agressively but controled and use corners effectively when needed, e.g. when you know opponents are approaching there.
Other useful obsticles
Besides corners there are other, although often less powerful obcticles in maps you can use to your strategic advantage:-
crates –
you can hide behind or rather stand behind them so that you are hardly visible and thus hardly hitable to you opponent -
trees –
dance behind them for example while you are reloading in a firefight and you got no chance of reloading behind a safe place… the tree may absorb some of the bullets of your opponent. -
walls –
where you can hide behind so that you see the full field and your opponent may hardly spot your head - …
All in all we can phrase the following rule:
-
Wolfenstein: Enemy Terrritory is a very fast game. In close combat often the player wins who hits first, so timing is crucial. While your opponent gets hit it will be much harder for him to aim at you or rather hit you because his screen shakes and you start off the fight as it were more health for you.
Headshots usually do 40/50[*] damage while bodyshots do less. Further more you got to know that the first shot usually hits where you aim at – without any weapon spread!
These two things we combine to the following rule:
Always point your crosshair at head-level where an opponent will most likely appear (or in the middle of two points when the likelyhood of an opponent popping up there is euqal) while you wander through the map.
Note that it doesn’t matter if you are searching for opponents and thus are moving forward or if you are escaping a firefight and are running backwards – your crosshair will stay always at the point where the head of your next opponent will most likely appear, so you minimize the way you got to move your crosshair until aiming directly at your opponent. I sometimes point the crosshair in the middle of two points if the likelyhood is equal for an opponent to pop up from the right and the left side. Avoid uneven and difficult terrrain in order to keep your cross-hair in place.
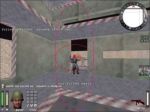
*Tip: use grooves to be on head-level
In many maps you can additionally use markings on the wall to keep your aim always on track (e. g. grooves on the walls inside buildings, see the thumbnail* or video-example**). Don’t look on the ground except for reviving, placing a mine, stealing an uniform and stuff like that or if you expect an opponent move along beneath you. Be prepared at corners where opponents often camp and enjoy the corner-camper calling you a wallhacker when you got him. Also include obsticles like crates in your pre-or “as if”-aiming when nescessary. First it may be hard to pursue this rule but after some time you will see you benefit because this makes sure two important things for you:
- you are the first one of both giving damage in the duel
- you probably initiate the fight with a headshot giving maximum damage
But: Instead of aiming for the forehead of you fictive oponents model, you should go a little deeper (have a look at W:ET’s hitbox-model). If your opponent hits you first – for any reason – from the front, your screen-shakes will make your cross-hair move up (see the analysis from madscientist under “shakes”). So if you aimed for the forehead in such a situation, you not a single bullet probably would have hit.
[*] damage given per headshot may be lower than 50 due to helmet protection on (usually -20% = 40 damagepoints per headshot), long ranges etc. Please find information on how many damage each weapon in ET gives here.
**Video-Example: Use markings on the walls to keep your cross-hair on head-level
-
Mastering weapon-spread to increase your accuracy
Thursday, November 20, 2008, 8:27
Filed under: Aiming | Tags: Aiming, bug, colt, Config, crosshair, crouching, knock back, luger, Madscientist, mouse, mp40, Overdrive, proning, RaZiel, spread, standing, sten, strafing, thomsonIn Wolfenstein: Enemy Territory you do not necessarily shoot at where your cross-hair points: like in real life bullets do spread. There are three dimensions where you should know the details to master spread and improve your accuracy and aiming: (A) the game engine, (B) your setup/configuration and (C) your way of playing.
But now to the insights…
(A) The game-engine and weapon-spread
In ET the spread of your standard weapons (mp40, Thomson, Luger, colt, Sten, …) is affected by 5 factors:
-
View: moving your cross-hair / looking around increases spread
The more you move your cross-hair around, the more weapon spread you will get. In times you move your mouse, spread increases while in times you don’t move your mouse, it will decrease steadily. Player velocity does not have any impact on spread of unscoped weapons. You can see the size of your weapon spread by activating cross hair-pulsing for example:set cg_crosshairPulse 1 // activate cross-hair pulsating
set cg_drawcrosshair 4 // cross-hair: little spot in center plus pulsating circle around it
big hitboxes (jaymod): hitable behind a corner
So be aware of the ET’s hitbox model (hitboxes are much bigger than the models which makes some cross-hair-movement unnecessary) and reduce cross-hair-movement to a minimum. Especially avoid erratic mouse-movements and trace as smooth as possible. RaZiel mastered the idea of aiming like this – have a look at his tutorial.
-
Shooting: continuous shooting increases spread
Short range fights usually don’t last long and every hit is crucial, so in most cases you are forced to shoot continuesly and shooting bursts is no option. Long range combats often last longer. Shooting small bursts of 3 to 5 bullets each should be considered if you can’t start of the fight with doing massive damage to your opponent. Concentrate on short range duels to get the maximum out of you rounds. -
Receiving Damage: getting hit by bullets increases spread
When you get hit by your opponent, your screen shakes. This will hurt your aim. Further more the knock back will raise weapon spread (analysis/implications from overdrive). Both make it inevitable for you to do your best not to get hit – strafe with and without stamina, use obsticles as cover, crouch, prone, … -
spread
Movement: crouching and proning decrease spread while beeing in the air dramatically increases spread
[GORE]Hallelujah did an analysis on how movement affects weapon-spread back in 2003. He found out that spread in standing/crouching/proning-position is nearly equal, when you fire small bursts of 2-3 bullets. If you fire continuously, the spread of crouching and proning is still the same but in standing position it is much higher (see screenshot). Further more Madscientist found out in his analysis 2006 that crouching will reduce spread to 50% from standing position. Being in the air (jumping, free fall, strafing on rough terrain, …) will result in twice the maximum spread you get when shooting in standing position. And proning will give you maximum spread for the first second and then decays to half the spread as crouching does. -
Experience-Points: light weapons level 4 and covert ops level 3 decrease spread
When you receive light weapons level 4, your weapon spread will reduce by 35%. (Note that it is level 4 and not level 3 like the manual says as [GORE]Hallelujah points out). Further more covert ops level 3 reduces spread by 35% for the Sten and the FG42. Interestingly this spread reduction seems to be transportable on the standard-weapons and also combineable with light weapons level 4 for maximum spread reduction (see analysis again from [GORE]Hallelujah). You should be aware of that to be able to evaluate your own aim and that of others on the server (e. g. if you join a server with players who have many XP). -
Your weapon choice: the MP40 (Axis) seems to have slightly less spread than the Thomson (Allies)
Spread: MP40 vs. Thomson
Ifurita from planetwolfenstein did an analysis some years ago in RTCW on how many rounds a weapon is able to fire per second. He found out that the MP40 has a slightly higher firering rate than the Thomson (~ 6 vs. 5 rounds per second). You should now probably expect compensating the Axis advantage by having more spread. On the contrary: from the screenshots he made you can conclude that the MP 40 also has slightly less spread when fired in small bursts from 3 to 5 rounds. Of course all on the condition that the analysis is a.) correct and b.) also applies on Wolfenstein: Enemy Territory.
(B) Your Config
- Mousepad/-underground: Make sure your mousepad is clean and you just a minimum friction between pad and your mouse. The more friction, the less smooth will be your mousemovement.
- Sensitivity: a sensitivity of zero would reduce weapon spread due to crosshairmovement to zero of course. But that wouldn’t be practical. 😉 Low sensers have got some advantages considering weapon spread. So they usually also do more headshots than high sensitivity users. I use a sensitivity of 5 in connection with pointerspeed 6 of 11 in windows xp which is very high, but manageable. See the Aiming by RaZiel-Tutorial for finding your sensitivity.
- FPS / Frames per second: As overdrive states in his article, FPS increases recoil and your mouse will react a lot faster the higher the frames per second. Keep your FPS high, but as stable as possible at the same time. I have a quite old computer and thus I use com_maxfps 76. In most maps I can archive a stable FPS like this.
- Mouserate: the higher, the smoother your aim can be. Basically you can chose between USB and PS/2. RaZiel stated 2003 that for him PS/2 worked better than USB, because with his Logitech Mouse he het a.) a higher mouserate of 200hz and b.) a more stable one that with USB (120hz). Overdrive stated 2006 in his article, that nowadays for most mice USB would be more suitable than PS/2 and that you can archive 450, 500 or even 1000hz. I myself use a Logitech MX518 with 200hz and inputbufferlength 100 on PS/2. With USB I could only get a maximum of 120hz. To check how often your mousedata gets refreshed check mouserate.exe from that RaZiel-Package (Tools-Folder).
- FPS > mousrate: Madscientist found out about the phenomenon that spread due to cross-hair movement will decrease when you got more frames per second than mouse signals per second. This sounds logical as some for some frames the game engine cannot register any mouse movement which results in decreasing spread. Turn spread can be even reduced to zero (!) when FPS is twice as high as the mouserate. So if you put your mouse on USB with standard polling rate of 125hz and you have constant 250fps – … lucky boy! 🙂
- Mouse-DPI / -Dots Per Inch: the more dpi, the smoother your aiming can be. But be aware of a little bug in the quake-engine that causes negative acceleration with high DPI.
-
View: moving your cross-hair / looking around increases spread
-
Saturday, November 22, 2008, 15:37
Filed under: Aiming, Fun | Tags: Aiming, bug, comic, etmain, etpro, exploit, Headshots, hitbox, just pub, model, offset, proning, standing_ b_realhead, strafing, [nw]reyalP
... acting headless?
In Wolfenstein: Enemy Territory each playermodel gets 2 or 3 boxes drawn around itself. Those boxes are the hitable sweet-spots – the hitboxes. Hitboxes have always been a problem in Enemy Territory as they seemed to be not accurate enough, wrong or even missing. This especially concerned the head-box which registers headshots that do up to 50 damage and thus far more than body shots what makes them very desirable. Bani tried to fix the problem with ET Pro and he came up with new headbox-code b_realhead (see changes in ET Pro 3.2.0, May 2005), better antilag-code and other stuff; but the results still seemed to be everything but perfect. Let’s have a look at some screenshots of ET Main & ET Pro hitboxes in different situations and draw implications for our gameplay.
Back in the year 2004, [nw]reyalP did an intersting analysis on the hitboxes in Enemy Territory. He used a custom MOD (never released though I think) which showed the hitboxes all the time (so not g_debugbullets). Also he used the ET Main code not ET Pro as he had no access to it; but from speaking with Bani, who said there weren’t any adjustments to the hitbox calculations (remark: some boxes were made taller than in ET Main) he was sure that it would also fit on ET Pro – when b_realhead is not > 0. Most servers today got b_realhead = 1 running, so that the following screenshots would not mirror accurately the hitboxes for the head.
hitbox-offset: strafing left with nade
Note: with b_realhead = 0 the heads hitbox is slightly offset to a moving player model – it actually follows slightly behind the player model; and with b_realhead > 0 the head hitbox should stay on the model while moving. To check whether you play on a server with the ET Pros head hitbox code, just enter the console and type:
/pb_cvarval b_realhead
Looking at his screenshots that contained player models in different movement situations (standing, crouching, proning, swimming, …), one state of the models animation, using different weapons (smg, grenade, …) plus the resulting hitboxes-calculation, reyaIP pointed out several interesting things:
- The player model head can be ahead of its hitbox in the direction in which the player strafes
- The player model ducks down a bit while moving, but its hitbox does not follow the model
- A player model holding a SMG has its head offset to the left (your POV), the heads hitbox does not follow
Click on the screenshots to make yourself a picture of this:
-
- etpro hitbox offset
-
- etpro hitbox offset
-
- etpro hitbox offset
-
- standing model with smg
-
- standing model with nade
-
- run forward
-
- strafe right with smg
-
- strafe left with smg
-
- starfe right with nade
-
- hitbox-offset: strafing left with nade
-
- crouch with smg and strafe right
-
- crouch with smg and strafe left
-
- crouch with smg and walk forward
-
- crouch with smg
-
- etmain prone-hitbox (etpro’s is smaller!)
-
- prone
-
- prone
-
- prone
-
- prone
-
- prone
-
- … acting headless?
-
- Swimming is like standing
-
- Just Pub #056
Besides the notes from reyaIP you can see other things, which have e. g. been reported in a forum around 2005: the heads’ hitbox while crouching is not nescessarily the forehead or helmet, but more or less the chin.
And finally quoted notes from reyaIP on the screenshots for proning-hitboxes, which we all like (2nd) best ;-):
- The head hitbox position is based on a fixed set of rules based on player view angles, but the player model is not. You can be looking in exactly the same direction, and the player model can be in very different positions with regards to the hitbox. Where the model is depends on what sequence of turns you used to get there. While this is true for all the animations, the effects are more extreme with the prone models.
- The animations that happen when you turn (or look up/down) have multiple effects. When you start to turn, just the head turns. At some point the body twists, then the feet shuffle around, and the whole thing starts over. Very nice from an eye candy point of view, but horrible in for the hit detection. Like the standing animation, the prone ones change a bit depending on what you are holding, and are different again for moving.
So if the hitboxes for proning are the 2nd best ones, which ones do we like most? 🙂
Swimming is like standing
Believe it or not: according to reyaIPs analysis the player model goes into swimming pose while diving/swimming and the hitboxes stick to the ones from player models in standing position.
Conclusions:
Hitboxes in Wolfenstein: Enemy Territory have always been a problem and will always rouse discussions. Well I think we got to live with the boxmodel and know about its bugs or “specialities”. For example aim for the chin and not for the forehead when you got someone crouched in front of you. And don’t look for the player model in front of you but have in mind the hitboxes that probably lie behind it. It’s often annoying and frustrating but everyone knows about the problems and thus everyone plays with equal opportunities. You just got to make the best of it… Perhaps we just got to take it with humour
-
Besides setting your overall sensitivity with “set sensitivity” you can do some fine tuning. With tweaking the variables m_pitch (vertical [up/down]-sensitivity) and m_yaw (horizontal [left/right]-sensitivity) in your configuration, you can effectively improve your aiming for getting more headshots.
How do m_pitch and m_yaw work?
illustrations may be the easiest way to describe the effect of a.) sensitivity, b.) m_pitch and c.) m_yaw:
-
- regular setup: m_pitch = m_yaw = 0.022
-
- headshot-friendly: lowered m_pitch
-
- lowered m_yaw (outer ellipse)
Note those are just illustrations to visualize that you can squeeze your mouse-responsiveness vertically and horizontally using m_pitch and m_yaw.
How does the game engine translate your mouse-movement?
As ruffnux points out in his acceleration-bug-report, every “count of frames” times per second the mousemovement is calculated like (1.) mouseX * sensitivity * m_pitch and (2.) mouseY * sensitivity * m_yaw. The default setting for m_pitch and m_yaw is 0.022. Now if you lower m_pitch or m_yaw, you get an ellipse instead of a circle for your vertical or horizontal mousemovement. So with lower m_pitch it will be easier for you to keep your cross-hair at head level. But as always: no pain, no gain, as on the other hand it will be more difficult to aim up and down (e. g. for compensating your cross-hair going down when crouching or proning or to aim at someone on a balcony or stuff like that).
How do I set up m_pitch and m_yaw?
Both settings depend on each other. As a rule of thumb ruffnux suggests to ensure m_pitch is at least 2/3 of what m_yaw is set to. So e. g. if you leave m_yaw at the standard setting of 0.022, set m_pitch to 0.66 * 0.022 = 0.015. Most servers will anyway include punkbuster-restrictions, that where introduced by clanbase at RTCW back in 2003. The reasons was to avoid players locking their cross-hairs to headshot height and so demanding more aiming skills. After restricting m_pitch to a range also m_yaw had to be set to a fixed range or value to achieve this goal. The reason is because you can also achieve a lower vertical responsiveness by (1) lowering your overall sensitivity and (2) compensating that by increasing your vertical responsiveness again with m_yaw to get back your original vertical sensitivity. The restrictions
pb_sv_cvar m_pitch out -0.015 0.015
pb_sv_cvar m_yaw in 0.022 or pb_sv_cvar m_yaw out -0.022 0.022This means your minimum values on punkbuster-servers can be 0.015 for m_pitch and 0.022 for m_yaw. So on punkbuster-servers those values should be set up to:
set m_yaw 0.022
set m_pitch 0.01501Are there other ways to tweak my vertical responsiveness?
Yes there are other ways. For example some mouse-drivers (Razer) will let you adjust your vertical and horizontal mouse responsiveness. Using some configuration hacks It was also possible for Logitech users in the past to use Razer-drivers with Logitech mice (see e. g. this article on Crossfire [thanks to oBs for the hint], “Razer Drivers with Logitech” on ESR or this guide):
Is this still possible – anyone tried it out?
-
-
As Wolfenstein: Enemy Territory uses 2 to 3 boxes drawn around the actual player model, it is essential for you to know how these boxes look to get a good aiming. So perhaps you want to check out for yourself what they look like in different situations (e. g. while climbing a ladder, while beeing in the railgun-train, while swimming, …). In order to view the hitboxes, you need a server that allows cheats and use debugbullets. Sadly in most cases there are no possibilities to view the hitboxes in your recorded replays/demos unless the game was recorded with cheats enabled, because the debugbullets hit boxes are server side things. But you of course can start a server on your own and have a look at those hitboxes, analyze them and improve your gameplay by beeing some knowledge-steps ahead. 😉
If you are alone and if you don’t have another PC in a network, do the following:
/sv_pure 0 // allow any custom content, like supplydepot

	/devmap MAP* // start a local server

	/g_debugbullets 8 // go into debug mode

	/cg_thirdperson 1// go in third person-view to see your hitbox

	/cg_thirdpersonrange 100 // play with the value

	/cg_thirdpersonangle 180 // play with that value, too
* replace MAP e. g. by oasis, fueldump, battery, railgun, goldrush, radar
If you have a second PC available in a network, start again a localhost-server with cheats enabled, connect the other server and again go in debug-mode:
/devmap MAP* // start a localhost-server on PC 1

	/connect 192.168.0.XXX** // type this on PC 2 to connect with PC 1

	/g_debugbullets 7 // go in debug-mode
** replace XXX with the local IP of PC 1 – get it e.g. by using “ipconfig” on ms dos-commandline
Now everytime you hit the other player model, its strong>hitbox-model will be visible to you and you can take a screenshot and do some analysis. Other useful things in this context:
/bind ENTER screenshot // bind "take a screenshot" to a key

/cg_railtrailtime 5000 // specify how long the boxes and bullet trails will be visible in ms -
Start ET, add the servers in the server list to your favorites list by checking the favorite box but do not connect to any servers; quit ET and start again and it should be a favorite and stay there.
-
Delete profile.pid in the profile folder of etmain and mod folders in your etmain directory and try again. Also if profile.cfg becomes larger than 21kb, it will not load. To fix this, place all your binds and settings into a cfg named "autoexec.cfg" which will automatically be run when you start up ET.
-
If you set your graphics quality to the "fastest" preset, it will set r_allowextensions to 0, which may cause punkbuster to kick you. You can make a cfg and have the following lines it it to run fastest and not be kicked:
exec preset_fastest_ui.cfg
r_allowextensions 1 -
You need to create a new profile in ET. You may also have to delete your old profiles, in etmain folder and all mod folders of you ET directory.
-
Always save the file named "etkey" found in the etmain folder of your ET directory. This file contains the code called a GUID used to identify who you are when you connect to a server, so that it can give you your xp and admin levels. Email this file to yourself or keep it on a flashdrive so you can restore it any time you need to. If you lost your GUID from something like reinstalling ET, just paste and replace into the etmain folder to insert your etkey if you ever need to.
To get back xp that was lost and you didn't save your etkey, you will have to ask an admin of the server to put xp or admin levels onto your current GUID. Should you do this, make sure to gather up as much proof as possible (screenshots, videos, reliable witnesses).
It is possible that you lost your xp some other way than your GUID being changed, in which case replacing your etkey cannot help you. Your xp could be lost by being taken away by an admin, or you were inactive from the server for too long.
Xfire has been known to overwrite your etkey. Should your etkey be continuously overwritten, right click on your etkey, go to properties, and make it a "read only" file. -
Check the setting of com_maxfps for starters. Make sure it isn't a low number, it should be at least the 40s or up. Next, try setting cg_drawfps to 1. Look near your kill-counter to see your FPS. If your FPS number is low when you lag, you have CPU based lag. If you have a high FPS number but still lag, it is connection lag. A high ping also determines connection lag, such as 400+, which you can check while pressing tab. Check the cfg section of this forum and try my low graphics cfg to reduce cpu lag.
As for connection lag, try setting these cvars to these values based on your connection:Code:-----56K Modem----------- cl_maxpackets "20" cl_packetdup "0" snaps "20" rate "5000" -----ISDN Single (64K)--------- cl_maxpackets "30" cl_packetdup "1" snaps "20" rate "7000" ---ISDN MultiConection/DSL (128K)--- cl_maxpackets "60" cl_packetdup "1" snaps "20" rate "15000" ----DSL 256K or faster----- cl_maxpackets "100" cl_packetdup "1" snaps "20" rate "25000"
There isn't much else in game you can do to lower your ping. You would have to have less background internet usage or have less people tapping into the same connection. Maybe you just have a slow Internet Service Provider.
If you have any questions, feel free to send me a PM. -
Enemy Territory: Frequent Problems and Solutions
Here is a topic where I will post the most common problems for W:ET and their solutions. Press Ctrl+F and type in whatever words you need to find, so you can quickly jump to where you need to be. Note that this is not a complete list, more will be added with time. The list could be long and get longer with additions. If you know of something I should add, let me know; a post in this topic is fine. There is a post length limit, so I will split this between 2 posts.
I think one of my programs is causing conflict with ET. Where can I find a list of such programs?
Programs that can cause problems with ET or PB are:- Get Right
- DU Super Controler
- Macro Toolsworks
- Girder 3.2
- PRTG Traffic Grapher
- MS Office: ctfmon.exe (rarely)
- CyberCorder: cybrcrdr.exe
- Paessler Router Traffic Grapher: prtg4.exe
- 3dnasys.exe
- mIRCStats
- [possibly] PeerGuardian
- iTunes
- Realtek Audio
These may or may not cause conflict with ET, I never tested any of this out, it is just what I found.
I get an error that says "Game Code (ui_mp_x86.dll) failed Pure Server check". What should I do?
If you are using Windows Vista or Windows 7, make sure you check the box that says "Run as Administrator". Not doing so will cause problems for ET.
If you don't know what to do, rick click on the ET icon and press "Properties". Click on the Compatibility tab. Look at the Privilege Level section and check the box that says "Run this program as an administrator".
I get an error that says "hunk allocate temp memory: failed on 3145784"
Some maps need more memory than the default. Change the setting "com_hunkmegs" to 128. You can set it higher, but only if you have lots of ram. 128 should be fine for anything.
I get an error that says "nv4_disp.dll" + infinate loop.
This is a problem that might occur from an Nvidia graphics card. This error is not that common, but I decided to post it here anyway, as I heard Nvidia graphics cards don't work well with ET on rare occasion. To fix it, you need to install a patch, which can be found here:
http://forums.nvidia.com/index.php?showtopic=4432
I get "openGL subsystem failure" error.
You need to update your graphics card drivers. You may even have to try an older driver. You may also need to remove the extension limit for you graphics card if you use Nvidia. It is possible for this to be caused by an antivirus or firewall. It is also possible that you need a newer sound driver, though graphics is more likely.
I have weird textures: jagged black areas, shiny surfaces, messed up colors, ect.
This one is difficult to describe, hopefully you recognize it if you have it. First, make sure that r_primitives is not set to 3 (should be 0 I think?). Try updating you graphics drivers. Try disabling Catalyst A.I. if you use an ATI card.
I only see a black/grey/other screen when I start ET. How can I fix this?
Try updating your graphics card drivers. If you are still experiencing problems, make a post with screenshots to better understand the problem.
Punkbuster problem "O/S Exception Violation / Ignoring Queries #9006"/
Try updating punkbuster manually. You can get this error if PB failed to auto-update. If you still have the problem, open Task Manager. Look for PnkBstrA.exe and PnkBstrB.exe in processes. If it isn't there, look in Services. If both of those are in neither tab, you will get this error. Restart your computer. If they are present, or restarting didn't work, try making sure you are logged on as admin and have compatibility mode for Windows XP. Turning off the UAC might work, but it is recommended NOT to do so.
Punkbuster keeps kicking me for ignoring MD5 tool queries. How do I fix it?
This is likely because a firewall or antivirus on your computer is blocking PB. Tell it to allow PB, or disable it while playing ET (turning off your firewall is not recommended).
I have an error that says "RESTRICTION: Service Communication Failure: PnkBstrB.exe initialization failed". I have a different error for punkbuster not listed here.
Try updating punkbuster. Make sure nothing is interfering with PB, such as an antivirus or firewall, or some program that interferes (list at top of page).
PunkBuster keeps kicking me for no CD_KEY
Start ET and enter "/pb_cdkeyreg" into the console.
I have an error that says Couldn't reopen C: \PROGRA~1\WOLFEN~1\etmain\pak0.pk3. I have an error that says "could not open default cfg". I have an error that says "Couldn't load an official pak file".
These problems are most likely caused because you are missing some necessary paks. Make sure you never delete any paks named pak0.pk3, pak1.pk3, pak2.pk3, or mp_bin.pk3. If you have deleted them, you will need to extract them from a fresh installation of ET, or reinstall ET.
If it says Couldn't load an official pak file, it may also mean that you are trying to connect to a server using a different ET version. Some servers run on 2.55 only, make sure you are not playing on 2.60b version.
I get an error "cl_ParseServerMessage: Illegible Server Message 0" whenever I try to connect to a server. What do I do to stop this message?
You may have older versions of pk3's that you need to get rid of. Delete some older pk3's from etmain and/or a mod folder. You can always download the ones you need from the server, but make sure you do not delete everything, as some paks are necessary to play ET: pak0, pak1, pak2, or mp_bin.
I can't see any servers in the server list. How do I get them back?
For one thing, make sure your internet connection is not out. Get on ET and click play; at the top are filter options: make sure source is set to Internet, Game Type is set to all, and try disabling the other filters as well. Sometimes the master ET server goes down for maintenance or for some issue. If this is the case, the server list will be down for everybody, but you can still connect to a server if you know the IP; this usually will not last long, so be patient and you can satisfy your ET crave soon.
Illegible server message or other error connecting to server.
You may have various errors during connecting to a server. All you have to do is wait a few seconds and then reconnect, and you should have no problems entering the server. If you do, just restart ET and try again.
Help! I am banned from a server and don't know why!
Make sure punkbuster is enabled. Click the button below the server list, or type pb_cl_enable in your console. Try replacing your ETkey in case something like xfire caused it to change. If you are still banned, make a request for an unban on the clan's forums. If you are banned by PunkBuster, you would have to make an appeal at pbbans.com. -
Will have to wait some more monthes to wear xmas skins

-
-
 1
1
-
-


Players cvars list
in ET Tips
Posted
This list contains all ETPro client cvars and commands (hopefully).
We have tried to include as much information in each description as possible, but some might require more explaining, so links to other pages here or the forums have been added.
Note: If there is any ETPro client cvars/commands that you think we have omitted or any that you think the description is wrong then pm me here, if you don't know how to edit this page. Before pm’ing/editing are you sure it’s an ETPro cvar/command and not another mods or an ETmain one, if it is ETPro then either edit or let me know what cvar/command we’ve omitted, adding a short description of what it’s use is, if known to you. If you think a description is wrong, quote the cvar/command and it’s description adding your description of it or edit.
Apologies for all the ..... to try create new lines or push things along to create a line so things look a bit better in some of the description sections, but i couldn't start new lines using the pitatable.
Cvars
Most of these cvars are either 0 (disabled) or 1 (enabled), those that differ I have included the values in the description. See Bitmask-cvar for more information on bit mask cvars.
Cvar Purpose
ltHud Controls which hud design you use, default 0 (normal hud), valid values 0, 1, 2 and 3. Three is custom mode where you can drag and drop the hud objects (i.e. compass, chargebar etc) where you would like them, but work was never finished on this.
b_altHudFlags Bitmask for controlling various hud settings if b_altHud = 1 or 2, default 0, valid values 0-7................... 1 = Move round timer, 2 = Don't display rank in hud, 3 = RTCW-ish message placement, 4 = Custom (drag and drop not working, coding was never finished)
b_antilag Controls whether shots are lag-compensated by the server, default 1, enabled, valid values 0,1,2........... 0 = Disabled, 1 = ETPro antilag enabled (best), 2 = ETmain antilag enabled
b_backupcvars Controls whether backup files are made when ETPro cvar restrictions are applied, default 1, enabled.
b_beginround Assign commands to this and they will be automatically executed at the start of new a round/map. See also b_endround.
b_centeredWeapons Centers weapon models on entity origins, making weapon pickup more predictable. default 1 = enabled, 0 old ET way.
b_chatAlpha Defines the alpha of the chat text, default 0.33, valid values 0.0 – 1.0, (0.0 = 100% transparent).
b_chatFlags Controls whether the team flag is drawn by each chat text, default 1, enabled.
b_chatsounds Controls playing a sound with chats, default 0, disabled.
b_cmdwarnings Controls notifications from the tjl_* commands, default 1, enabled.
b_debugfakebmodel Controls debugging EF_FAKEBMODEL brushes in map scripts, default 0, disabled, (cheat protected).
b_debuglocations Bitmask to enable debugging/design aids for location names. Works with external dats as well as target_location ents, default 0, valid values: 0 - 31, (cheat protected).................................................. 1 = Draw a bubble sprite at each location marker. The nearest location is drawn in green, with all the others being drawn in red...... 2 = Add a dynamic light at each location marker. The nearest location is lit in red, with all the others being lit in green...... 4 = Draw floating text at each location marker containing the location's name. The nearest location is colored green instead of white...... 8 = Send updates to other players when a location is added, deleted, or renamed. This function is designed to allow several people to work on adding locations to a level simultaneously...... 16 = Accept updates to locations from other players who are using b_debuglocations 8.
b_demo_autotimescale Controls the timescale to switch to when a weapon set in b_demo_autotimescaleweapons is fired, default 1.
b_demo_autotimescaleweapons Bitmask to automatically change the timescale when a certain type of weapon is fired, default 0, disabled, valid values 0 – 31. 1 = Panzerfaust, 2 = Grenade, 4 = Dynamite, 8 = Mortar, 16 = Smoke grenades and airstrike markers
b_demo_drawspectatormessages Controls whether "spectator/weaponcam/shoutcaster/etc" overlay is drawn in demo playback, default 1, enabled.
b_demo_dynamitecam Controls whether to attach the camera to dynamite during demo playback, default 0, disabled.
b_demo_dynamitecounter Controls drawing a floating counter above armed dynamite during demo playback and when spectating as a shoutcaster, default 0, disabled.
b_demo_followxDistance Controls camera offset when attached to a weapon, default 50.
b_demo_followyDistance Controls camera offset when attached to a weapon, default 0.
b_demo_followzDistance Controls camera offset when attached to a weapon, default 20.
b_demo_freecamspeed Controls the freecam movement speed, default 800.
b_demo_grenadecam Controls whether to attach the camera to these types of grenades during demo playback, default 0, valid values 0, 1, 2, 3.................. 0 = Disabled, 1 = Grenades (hand-thrown thrown and rifle grenades), 2 = Airstrike markers, smoke grenades, 3 = 1 and 2
_demo_lookat Causes the freecam to lock its view on the specified player (i.e. /b_demo_lookat clientnum), default –1, disabled. To get client numbers in demos see b_demo_nametags for explanation.
b_demo_mortarcam Controls whether to attach the camera to mortars during demo playback, default 0, disabled.
b_demo_nametags Bitmask controlling how floating names above each player are drawn during demo playback and when spectating as a shoutcaster, default 0, valid values 0-15............ 0 = Disabled, 1 = Draw visible players, 2 = Draw all players, 4 = Draw the player's client number, 8 = Draw the player's class.
b_demo_nopitch Controls whether the camera pitch’s while it's attached to weapons, default 1, enabled (no pitch).
b_demo_panzercam Controls whether to attach the camera to panzers during demo playback, default 0, disabled.
b_demo_pitchturnspeed Defines the pitch turn speed while using the +freecam_* commands (demo playback only), default 140, see also b_demo_rollspeed and b_demo_yawturnspeed
b_demo_playersprites Controls whether the floating sprites (e.g. voicechat, objective, invulnerability, fireteam, and connection markers) are drawn above players' heads in demo playback, default 1, enabled.
b_demo_pvshint Controls whether to draw a line from the freecam origin to the origin of the demo recorder, default 0, disabled.
b_demo_rollspeed Defines the roll speed while using the +freecam_* commands (demo playback only), default 140, see also b_demo_pitchturnspeed and b_demo_yawturnspeed
b_demo_teamonlymissilecam Controls whether to attach the camera to weapons fired by demo recorders team only, default 0, disabled.
b_demo_yawturnspeed Defines the yaw turn speed while using the +freecam_* commands (demo playback only), default 140, see also b_demo_rollspeed and b_demo_pitchturnspeed
b_demorecord_statusline Controls the y offset of the demo/tjl/tjg recording status line. Use -1 to disable these status lines completely, default: 470, valid values -1, 0 - 480.
b_descriptiveTextscale Controls the limbo hud text size, default 0.8.
b_dinghy Have no idea what this does, or maybe we do.
b_drawclock Controls whether to show a clock with your local time on the hud, default 0, disabled.
b_drawPromotions Controls whether the rank promotion messages are shown (and whether sounds played) when receiving a promotion, default 1, enabled.
b_drawranks Controls whether ranks of other players are drawn when using cg_crosshairnames, default 1, enabled.
b_drawRewards Controls whether skill level increases and reward messages are shown (and whether sounds played), default 1, enabled.
b_drawspectatoralpha Defines the alpha of the "spectator", "shoutcaster", "freecam", etc. notices (0 = 100% transparent), default 1, valid values 0.00 - 1.00
b_drawspectatorteamflags Controls whether to draw a small team flag beside the player name when following players in spectator mode, default 1, enabled.
b_drawspeed Controls whether to draw a speedometer on the hud, default 0, valid values 0, 1, 2, 3, 4, 5................... 0 = Disabled..... 1, 5 = Draw a speedometer....... 2, 4 = Draw a speedometer and the maximum speed reached...... 3, 4, 5 = Draw a speed graph if the lagometer is not being drawn
b_endround Assign commands to this and they will be automatically executed at round end. See also b_beginround.
b_fireteamAlpha Defines the alpha of the fireteam overlay, (0 = 100% transparent), default 1.0, valid values 0.00 – 1.00.
b_fireteamLatchedClass Controls showing latched player class instead of rank in fire team hud display, default 1, enabled.
b_goatsound Controls whether a sound is played on knife kills, default 1, enabled.
b_hitsounds Controls whether to enable hit sounds, default 0, valid values 0, 1, 2............ 0 = disabled, 1 = enabled, 2 = enabled for headshots only
b_hudYoffset Moves the hud so it is out of the way of the demo status line. Set to 0 to move the hud flush with the edge of the screen, default 10.0, valid values 0 – 640.
b_killshot_delay Determines the time in milliseconds to take an automatic screenshot after a kill, default 0, disabled.
b_lagometerAlpha Defines the alpha of the lagometer, default 1.0, valid values 0.00 – 1.0 (0 = 100% transparent). Link at the bottom of page for more info about the lagometer.
b_locationJustify Controls justification of locations in fire team hud, default 0....................... -1 = left justify with padding, 0 = left justify no padding, 1 = right justify with padding
b_locationMaxChars Controls the number of characters of location names in the Fireteam hud, default 25, valid values 0-76.
b_locationMode Bitmask to control how locations are displayed in the fireteam hud, default 0, valid values 0-31............ 0 = Default, currently equivalent to '1'...... 1 = Show location names...... 2 = Show location coordinates, 4 = Do not check whether locations are in your PVS when searching for a location name. Applies to b_debuglocations and add/del/etc., too...... 8 = Don’t fall back to location coordinates when no location name was found, instead, show "unknown"
b_logbanners Controls whether server banners are logged in your console, default 1, enabled.
b_mapconfigdirectory Defines the folder name to look for map-specific cfg/config files.
b_mapzoom Controls the zoom level for the map shown in the compass, default 5.159, valid values 1.0 - 7.43.
b_muzzleflash Controls whether first-person muzzle flash is drawn, default 1, enabled.
b_noactivatelean Controls whether to enable/disable leaning behaviour when strafing with +activate, default 0.................. 0 = +activate and +moveleft/+moveright causes the player to lean left/right........ 1 = leaning behaviour is disabled
b_numPopups Controls the number of popup messages on the hud, default –1...... -1 = Use ETmain cg_drawSmallPopupIcons setting, (if cg var = 0) 5 popups, (if cg var = 1) 8 popups...... 0 = Disable popup messages entirely...... 1 = Use ETmain cg_drawSmallPopupIcons 1, 8 popups...... 'number' = Limit the number of popup messages on the hud to the number of your choice
b_optimizePrediction Controls whether to attempt to use previously calculated prediction results when possible to increase performance or not, default 1, enabled. Link at bottom of page for more info on this.
b_panzerhack Controls whether the secondary MP40/Thompson (for a soldier with level 4 heavy weapons) is moved to weaponbank 2, default 1, enabled.
b_placebo When this cvar is enabled, anything is possible. Link at bottom of page which explains this better.
b_popupFadeTime Defines the time in milliseconds that popups take to fade out, default 2500.
b_popupStayTime Defines the time in milliseconds that popups will stay before fading, default 2000.
b_popupTime Defines the time in milliseconds between popups, default 1000.
b_predefineddemokeys Controls whether demo playback uses hard-coded key bindings, which cannot be overridden, default 1, enabled...... 0 = Lets you use your own key bindings in demo playback, at the loss of the predefined key actions...... 1 = Hard-coded key bindings, which cannot be overridden.
b_shovesounds Controls whether you hear shove sounds, default 1, enabled.
b_simpleItems Controls whether to draw sprites instead of models for items, for a slight performance/visibility increase, default 0, disabled.
b_spectatorteamflags default 1, enabled.
b_speedinterval Defines the time in milliseconds between two speedometer updates, default 100.
b_speedunit Controls the speed unit used for the ups meter, default 0, valid values 0, 1, 2...... 0 = (ups), 1 = (mph), 2 = (km/h)
b_textcolorfilter Strips certain colour characters from names and most text messages, default "", use "*" to filter all.
b_tracers Controls bullet tracers, default 1, valid values 0, 1, 2...... 0 = Disabled, 1 = Show all tracers, 2 = Don't show own tracers
b_votetextscale Defines the scaling for the vote text, default 0.8.
b_watermarkAlpha Defines the alpha of a watermark (if server has one), default 1, valid values 0.00 – 1.0 (0 = 100% transparent).
b_weapaltReloads Controls whether weapalt doubles as reload for weapons lacking an alternate fire mode, default 1, enabled.
Commands
Clients can use to either bind, get info in the console or use with rcon, ref and semiadmin.