
SOFTWARES
Almost for ET
17 files
-
DSK_etkeygenerator_2015
By kate
Once it has downloaded (this should only take a second or two as it's a very small file), copy the etkey file to the relevant folder:
First, go to the https://ets-clan.com/index.php?/files/file/1068-dsk_etkeygenerator_2015/&do=edit and click Generate Etkey!
WinXP: C:\Program Files\Wolfenstein - Enemy Territory\etmain\
Vista/Win7 64bit: C:\Program Files (x86)\Wolfenstein - Enemy Territory\etmain\
Vista/Win7 32bit: C:\Program Files\Wolfenstein - Enemy Territory\etmain\
Mac OS X: /Users/username/Library/Application Support/Wolfenstein ET/etmain/
Linux (*): /home/username/.etwolf/etmain/
*Based on Ubuntu setup.
Note: On some installations of Windows 7, you may also need to copy your new ETKey file to: C:\Users\username\AppData\Local\PunkBuster\ET\etmain\
You should now be good to go - start up wolfenstein and you should have a new GUID. You can check by typing /cl_guid into your console and seeing if it displays any letters/numbers.
Not working?
If /cl_guid reveals that you have an *Unknown* guid, join a server then type the following:
/pb_cl_enable; pb_system 1; pb_writecfg; reconnect;
This should solve all issues.
13 downloads
(0 reviews)0 comments
Updated
-

Enemy Territory Auto pk3 cleaner 13
By kate
About This File
Enemy Territory Auto pk3 cleaner cleans up extra non stock or custom pk3 from your etmain and mod folders.
Fixed some old links
Added auto clean *.tmp files
3 Steps:
1-> Download - Correction version i.e. For standard 2.6b Install use Stock-2.6b-pk3-cleaner-v13.exe and for ETLegacy - use ETLegacy version.
2-> Double Click
3-> Install
(if you've changed ET folder!! on step 2 hit browse to the right ET folder)
It removes any file with name start or have:
~~.pk3 (used for customized menu)
**.tmp (un-finished download pk3, better delete if ET crash)
**.pid (resets configuration to default settings if ET crash)
Run this file to keep your ET installation clean. Less pk3 you have installed, more faster your ET will start.
How to use video tutorial:
http://www.youtube.com/watch?v=JICj4erGXqY&hd=1
24 downloads
(0 reviews)0 comments
Updated
-

rarstats
By kate
Not remember at all what mod can have it running ..
Round Robin Database Tools
It is pretty easy to gather status information from all sorts of things,
ranging from the temperature in your office to the number of octets which
have passed through the FDDI interface of your router. But it is not so
trivial to store this data in a efficient and systematic manner. This is
where RRDtool kicks in. It lets you log and analyze the data you gather from
all kinds of data-sources (DS). The data analysis part of RRDtool is based
on the ability to quickly generate graphical representations of the data
values collected over a definable time period.
To compile:
-----------
sh configure
make <------ GNU make
make install <------ GNU make
This will configure, compile and install RRDtool in
/usr/local/rrdtool-VERSION. If you prefer to install RRDtool in some other
place, use
sh configure --prefix=/some/other/RRDtool-dir
If you prefer to live with shared libraries, make sure you add the
--enable-shared option to your configure call.
sh configure --enable-shared
The configure script will try to find your perl installation (5.004
preferred). If it does not find it, you can still build RRDtool but no perl
modules will be generated.
By default the perl modules will be installed under the RRDtool install
directory. This will require you to use a 'use lib' statement in your
RRDtool perl programs. If you do not care what happens to your site-perl
directory, you can also use
make site-perl-install
will install the perl modules whereever you keep your local perl modules.
Doing this reliefs you from using 'use lib' in your scripts.
Configure will also look for an TCL installation on your system. If it finds
one it will build a TCL interface for rrdtool. If you keep tcl in a non
standard location you can use
sh configure --with-tcllib=/sw/tcl-8.3/lib
to indicte the right version (note, this must point to the directory where
tclConfig.sh is located). Note that install will integrate the tcl bindings
into your tcl installation. It will use a separate directory for each
version though, so this is not much of a problem. Never the less the TCL
module will not get intalled by default as TCL wants its module in the base
tcl installation where you might not be able to write to. So if you want the
tcl stuff installed, type
make site-tcl-install
Getting Started:
----------------
Either after compiling or after installing you can try the example
RRDtool applications in the examples directory.
To learn:
---------
Read the documentation in the doc directory. Start of with
RRDtool. All documents are available as html and as ASCII text.
If you are looking for a more slow paced introduction, make sure to read
Alex van den Bogaerdt's rrdtutorial which is also available from the doc
directory. Also read his cdeftutorial and Steve Rader's rpntutorial.
If you want to know about the format of the log files check
src/rrd_format.h there are a lot of comments in there ...
How to make Tobi happy:
-----------------------
If you want to show your appreciation for RRDtool you could make me happy
by going to ee-staff.ethz.ch/~oetiker/wish and ordering a CD from
my CD wish list ...
How to keep in touch:
---------------------
There are 3 Mailing lists for RRDtool:
rrd-announce LOW volume RRDtool Announcements List (Only Stable Releases)
rrd-users For discussion amongst people who use RRDtool in their applications
rrd-developers For people who actually HACK RRDtool code
To subscribe to <MAILGLIST> send a message with the subject 'subscribe'
to <MAILGLIST>[email protected].
Note, that postings to rrd-announce will always be cross-posted
to rrd-users and rrd-developers as well.
To Contribute:
--------------
Contributed feature and bug patches are most welcome. But please
send complete patches. A complete patch patches the CODE as well
as the CHANGES, CONTRIBUTORS and the POD files.
Use GNU diff --unified --recursive olddir newdir to build your patches.
The latest Version:
-------------------
Is available from http://ee-staff.ethz.ch/~oetiker/webtools/rrdtool/
Tobias Oetiker <[email protected]>
32 downloads
(0 reviews)0 comments
Updated
-

MacOs installation
By kate
GAME DESCRIPTION
Wolfenstein: Enemy Territory is a downloadable, free-to-play multiplayer game in which players wage war as Axis or Allies in team-based combat. It’s a team game; you will win or fall along with your comrades. The only way to complete the objectives that lead to victory is by cooperation, with each player covering their teammates and using their class special abilities in concert with the others.
Featuring multiplayer support for up to 32 players, Wolfenstein: Enemy Territory is the ultimate test of communication and teamwork on the battlefield. Players join the fray as one of five distinct character classes each with unique combat abilities. Each Axis or Allies team can divide itself into smaller fire teams for quick and easy communication using an intuitive messaging system and dynamic command map of the entire battlefield.
Read more: How to play Wolfenstein: Enemy Territory in 2019
7 downloads
(0 reviews)0 comments
Submitted
-

Linux installation
By kate
GAME DESCRIPTION
Wolfenstein: Enemy Territory is a downloadable, free-to-play multiplayer game in which players wage war as Axis or Allies in team-based combat. It’s a team game; you will win or fall along with your comrades. The only way to complete the objectives that lead to victory is by cooperation, with each player covering their teammates and using their class special abilities in concert with the others.
Featuring multiplayer support for up to 32 players, Wolfenstein: Enemy Territory is the ultimate test of communication and teamwork on the battlefield. Players join the fray as one of five distinct character classes each with unique combat abilities. Each Axis or Allies team can divide itself into smaller fire teams for quick and easy communication using an intuitive messaging system and dynamic command map of the entire battlefield.
Read more: How to play Wolfenstein: Enemy Territory in 2019
14 downloads
(0 reviews)0 comments
Submitted
-

windows installation
By kate
GAME DESCRIPTION
Wolfenstein: Enemy Territory is a downloadable, free-to-play multiplayer game in which players wage war as Axis or Allies in team-based combat. It’s a team game; you will win or fall along with your comrades. The only way to complete the objectives that lead to victory is by cooperation, with each player covering their teammates and using their class special abilities in concert with the others.
Featuring multiplayer support for up to 32 players, Wolfenstein: Enemy Territory is the ultimate test of communication and teamwork on the battlefield. Players join the fray as one of five distinct character classes each with unique combat abilities. Each Axis or Allies team can divide itself into smaller fire teams for quick and easy communication using an intuitive messaging system and dynamic command map of the entire battlefield.
Read more: How to play Wolfenstein: Enemy Territory in 2019
22 downloads
(0 reviews)0 comments
Submitted
-

ET 260b
By kate
This is a modified ET.exe file, version 2.60b
The master server address has been changed from etmaster.idsoftware.com to masterser0.etmaster.net.
A new master server has been setup et etmaster.net, to get your server on the list, or for more information,
please visit http://etmaster.net/
17 downloads
(0 reviews)0 comments
Updated
-
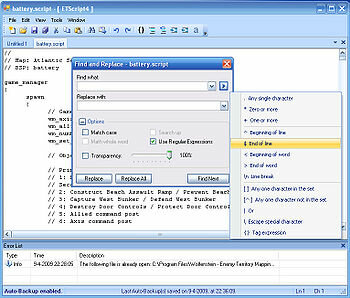
et-script_3-1
By kate
By Falkes
is a script editor designed specifically for Wolfenstein: Enemy Territory map script files. These script files are usually written in simple text...
8 downloads
(0 reviews)0 comments
Submitted
-

WolfDED + et300
By kate
Sources ETtrackbase
WolfDED for windows servers
et300 for linux servers
== Credits & Notes ==
ET 3.00 is currently developed by Pauluzz
Credits for tracking integration go out to morsik. Special thanks for support to Solchanel.
The development is still very active, and so it can happen that there will be regular updates.
Please check for updates once in a while to see if there is anything that concerns you!
Latest version: 0.7.4 (23-5-2015) • Download
Download for Linux Download for Windows *You can rename the files to anything you like if needed! == Instructions ==
Default the game runs on 2.60b protocol 84 while accepting also legacy 2.55 clients.
For statistics tracking, be sure to unblock port 4444 UDP outgoing. • Startup Line Options
- You can list the server in both masterlites (2.55/2.60b) if you add +set net_port_extra at the startup line. Both client version can connect on both ports. +set net_port_extra PORTNUM - The server has auto update for new versions, if you do not want this put +set sv_autoUpdate 0 IN YOUR SERVER STARTUP LINE. This can not be changed during runtime. +set sv_autoUpdate 0 • Runtime/General Options
- You can enable protocol checking with (default is off/0) set sv_protocolcheck "1" - You can set the default protocol with (default is 84; possible options: 82/84) - this will also determine which clients can connect if sv_protocolcheck is enabled. set sv_protocol "84" - You can allow/disallow users with sv_allownoguid and edit the kick message with sv_guidkickmsg (default ALL people are allowed to connect/this is RECOMMENDED as many people DO NOT play with guids anymore) set sv_allownoguid "1" // 1 ENABLES IT, DEFAULT = 0, RECOMMEND LEAVING IT AT 0
set sv_guidkickmsg "You have been kicked because you do not have a valid GUID. - You can enable the chat relay by setting: set sv_chatRelay "1" // 1 ENABLES IT, DEFAULT = 0 • RCON Tools
- You can enable the rcon filtering by set sv_rconfilter "1" set the sv_rcon1 up to sv_rcon5 to whitelist rcon ip's while using sv_rconfilter "1" you can also use a * here to specify a range like 9.8.2.* • Network Options
- You can enable the rrdoss protection with (default: 0, put it on 1 to enable) set sv_maxGetstatusCheck "1" - You can change the reflective ddos tresshold by changing set sv_maxGetstatusPerMinute "A_VALUE" - You can auto add ddossing IP's in iptables with setting set sv_maxGetstatusBeforeIPTABLES "1200" Any value above 0 will be the max packets per minute a host can send before it gets in, with a typical rddos you would get ~1200 packets per minute. IT IS NOT, I REPEAT, NOT RECOMMENDED TO PUT THIS VALUE ANY LOWER, DOING SO CAN CAUSE YOU AND/OR YOUR PLAYERS TO BE UNABLE TO REACH YOUR SERVER • Notes
- ET 3.00 works with NoQuarter but does not let multi-protocol clients join, keep that in mind! == Changelog ==
Version (released) 0.7.4
- Fixed abuse for authserver, this is now disabled by default.
Version (released) 0.7.3
- Anti-Flood logging
- Improved memory usage/speed of anti-flood filter
Version (released) 0.7.2
- q3boom exploit fix
Version (released) 0.7.1
- Possible fix for silent guid error - Chat Relay is now fully functional (default disabled, set sv_chatRelay 1 to enable
- TB functions, on 0.7.1 servers type tb_help to see available commands
Version (released) 0.7.0
- Stats Tracking fixed for windows servers
- Chat Relay for server admins (default disabled, set sv_chatRelay 1 to enable
- Several Optimizations
Version (released) 0.6.7
- Jaymod fix with guidkick
Version (released) 0.6.5
- Fixed NQ compatibility
- Fixed bug introduced in 0.5.2 (not likely to happen, but updating is recommended)
Version (released) 0.6.4
- Fix for getstatus rddos protection
Version (released) 0.6.3
- Fixed security bug that could let the server crash
- Players without any guid should be able to play on enhancedmod servers now as well
51 downloads
(0 reviews)0 comments
Updated
-
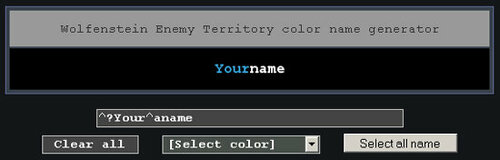
wolfenstein et - nickname creator
By kate
open the html
wolfenstein et - nickname creator.html
27 downloads
(0 reviews)0 comments
Updated
-

ConTEXTv0_986
By kate
If you need a fast, robust and reliable free text editor, ConTEXT would be one of the best options for you. It comes with a custom syntax highlighter, so software and web developers will find it quite useful. Although small and versatile, ConTEXT comes with plenty of nifty features and options. It even supports automatic…
10 downloads
(0 reviews)0 comments
Submitted
-

Qtracker
By kate
plus is in real times so since splatter and ettb seem to have some problems atm feel free to use qtracker
21 downloads
(0 reviews)0 comments
Updated
-

ET-emoticons
By kate
a lil emoticons pack
Credits:
axis*.gif and allied*.gif created by Rookie0ne, as posted in
http://splashdamage.com/index.php?name=pnPHPbb2&file=viewtopic&t=13253&highlight=emoticons&sid=02fef3b6375c34f622618fa51120109c
The rest of the icons are of an unknown origin
16 downloads
(0 reviews)0 comments
Updated
-
 (0 reviews)
0 comments
Submitted
-

BooBooDemoPlayer
By kate
BooBoo DemoPlayer
version : 0.5
Date: 01-2007
Web: http://zeldamx.free.fr/
contact: booboopowa <at> yahoo.fr
irc: #dsk.et <at> Quakenet.org
BooBoo DemoPlayer pour Wolfenstein :
Ennemy Territory 2.60, mod ETpro uniquement !
Permet de lire et de configurer le lancement
d'une demo (dm_83/dm_84) à l'aide de fichier
de configuration (*.cfg).
* INFORMATIONS
Le fichier language.lng doit se situer dans le meme repertoire
que BooBooDemoPlayer.exe...sinon ca bug...
L'option "fichier de configuration" et "exec_at_time" sont
différentes, l'une permet de charger un fichier
de configuration au lancement de la demo (ex: cfg graphique)
et l'autre de déclenché un script a un moment précis
de la demo (ex: camera scripté)...
Pour utilisé l'option EXEC_AT_TIME il vous faut
la version 3.2.0 de ETpro minimum, il faut aussi
que le/les fichiers ce situe dans le repertoire
ETpro, vous pouvez les mettre aussi dans un repertoire
ex: etpro/mesScript, évitez les espace ;)
Le bind correspond a la touche a taper lorsque
la demo sera lancer afin de validé le déclenchement...
si tous ce pass bien le message suivant apparait
dans la console du jeu:
I will execute MonScript at xxxxxxxxx have a good flight o/
Le timecode en ms correspond au moment
ou vous voulez lancer le script. Pour connaitre
ce timecode, lancez la demo, dans la console
tapez /show_framecount 1, notez le time code
et reportez le dans BooBooDemoPlayer
N'oubliez pas, une fois la demo lancer, de pressé
le bind pour validé le declenchement du script...
Enjoy!!!
Optimization [sb]gg67
http://ct3d.twen.name/
Debug Team DSK
http://dskteam.free.fr/
Traduction TazNormand & Matt
http://www.teamstale.eu/
Une spécial pour Fred59
Mais pas pour P2fouf y sux trop...lol...
BooBoo powa!
http://zeldamx.free.fr/
16 downloads
(0 reviews)0 comments
Submitted
-

GtkRadiant for windows, linux and Mac Os x
By kate
http://easymapping.free.fr/html/tuto/install.php
https://icculus.org/gtkradiant/
160 downloads
(0 reviews)0 comments
Updated
-

ET Installation for all os
By kate
for the et260b.x86_full.zip
ET repackaged installation for Linux (server / client), including etkey generator, current Punkbuster version (server / client)
and ET 2.60b patch
openurl.sh is redesigned to support Firefox, Konqueror, Opera and Chrome (Function open in external browser).
The following package must be installed for the function of etkey generator:
- ntp
- dialog
- xterm
- sudo
Adds the requirement of the user performing the installation of the file sudoers.
edit:
/etc/sudoers
search:
# # Allow root to run any commands anywhere
root ALL = (ALL) ALL
then adds:
<Your username> ALL = (ALL) ALL
tested on OpenSuse 11.4, Fedora 16 and Ubuntu 11.10 (client side)
as well as Debian 5.0 (server side).
Copy the file 'openurl.sh' from the installation directory
to your / home / .. / .etwolf.
After installing the etkey generator is in the installation directory is still available. File name: etkey.run
Tested with OpenSuse 11.4 and Ubuntu 11.10 (client side) and Debian 5.0 (server side)
##############################################################################################################################
Bitte zuerst lesen !!!
neu gepackte ET-Installation für Linux (Server/Client), incl. etkey-Generator, aktueller Punkbuster Version (Server/Client)
und ET 2.60b Patch
openurl.sh ist überarbeitet und unterstützt Firefox, Konqueror, Chrom und Opera (Funktion öffnen im externen Browser).
Folgende Paket müssen installiert sein und werden zur Funktion des
etkey-Generators benötigt:
- ntp
- dialog
- xterm
- sudo
Fügt bei Bedarf den User der die Installation durchführt der Datei sudoers hinzu.
editiert:
/etc/sudoers
suche:
## Allow root to run any commands anywhere
root ALL=(ALL) ALL
fügt danach hinzu:
< dein Benutzername > ALL=(ALL) ALL
Nach der Abschluss der Installation die Datei openurl.sh aus dem Installationsverzeichnis
in eurer Verzeichnis /home/../.etwolf kopieren.
Nach der Installation steht der etkey-Generator im Installationsverzeichnis weiter zur Verfügung. Dateiname: etkey.run
getestet unter Opensuse 11.4, Fedora 16 und Debian 11.10 (clientseitig)
sowie Debian 5.0 (serverseitig).
72 downloads
(0 reviews)0 comments
Submitted
-
Top Downloads
-